I have not been posted here for a while, so to break the silence, today I’ll show you how to configure iOS Shortcuts application with Foursquare API to speed up your checkins using Swarm app on a daily basis.
This integration will open new doors about integrating more and more shortcuts as well as with other applications.
I am going to walk through with the following high level tasks:
- Sign in to Foursquare.
- Create an application profile to mimic we are a third party application.
- Obtain an access token to the “application” with our Foursquare profile.
- Gather the venue ID from Foursquare.
- Create the workflow to create your first checkin.
Let’s checking in programatically.
Create an application profile
Before we can jump right into the “fun” part, we have to sign in with our Foursquare/Swarm profile on the following URL: https://developer.foursquare.com/
Once you are in, search for the button “Create a new app”.
On the next screen, provide a name and an app URL. For example:
- Name: Apple Shortcuts
- URL: https://burgatshow.com
For the question “Who are you buildin an app for” select the last one: “I’m building an application for my own personal use”.
For the next section, select “Access to Check-In or User data”.
Agree the T&C and proove that you are a not a robot and click on the “Continue” button. On the next screen, select “Personal – Non-Commercial” account tier.
If you want to verify your account, you can do so, but it is not mandatory.
Once you finished the app registration, you will see on your homepage of your newly created application with a Client ID and a Client Secret codes. NEVER share those two with anyone else! Those identify your application and once it is compromised, anyone can impersonate your application, even if you are created for your personal use.
The last step is to edit your application and provide a Redirect URI(s). To do so, open your application’s profile using the View/Edit App link next to the header, scroll down a bit and add an URL in the Redirect URI input. I used the same URL like the Application URL section.
Save the changes.
Get an access token
So we have a known application, now we have to grant access to this application from our profile. To do so, follow the steps below:
With your browser, go to URL:
https://foursquare.com/oauth2/authenticate?client_id=YOUR_CLIENT_ID&response_type=code&redirect_uri=YOUR_REGISTERED_REDIRECT_URI
Replace the values in the URL with your client ID and your URL and open. If your configuration is OK, you should see something like on the screenshot below.
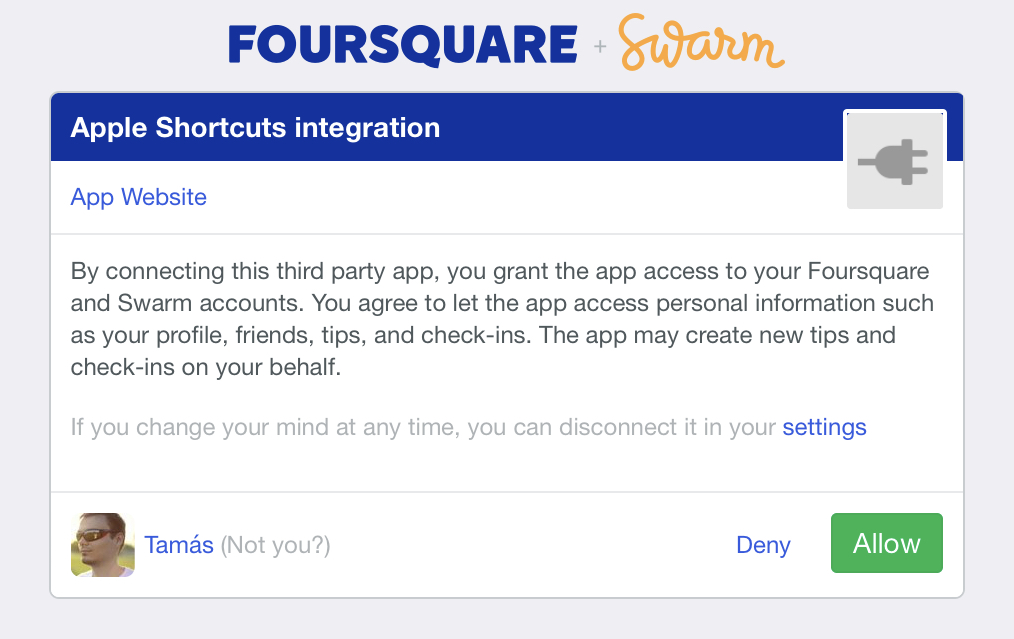
Allow access to your app. The site will be redirect you to your configured Redirect URI with a parameter called code in the URL. Something like this:
https://YOUR_REGISTERED_REDIRECT_URI/?code=CODE
Note the code right after the code=until the end of the URL.
The last step is to exchange the code with Foursquare. Technically we are now binding access to our app to our Foursquare profile. Still using the browser open the following URL:
https://foursquare.com/oauth2/access_token?client_id=YOUR_CLIENT_ID&client_secret=YOUR_CLIENT_SECRET&grant_type=authorization_code&redirect_uri=YOUR_REGISTERED_REDIRECT_URI&code=CODE
Replace the variables with your data such as client ID, client secret, code and the redirect URI. If you completed the find and replace game and opened the URL, you should receive a JSON string containing your access token in a similar form:
{“access_token”:”a very long random letters and numbers”}Put this “a very long random letters and numbers” to a safe place, this will be used in the Shortcuts app.
Get the venue ID from Foursquare
The last info you need to obtain before creating a shortcut is the ID of the venue on Foursquare where you want to checkin from it. Head to the https://foursquare.com, sign if neccessary and navigate to your checkin history.
From the list of your last checkins, search for your venue (your home, work whatever and open it by clicking on its name.
A new page will be opened with the details of the venue and if you check the URL in your browser, you should see something like:
https://foursquare.com/v/<name of the venue>/<random string>
The <random string> in the URL is your venue ID. Note it and move on with this post.
Now you can close/sign out from every Foursquare page, and open your Shortcuts application on your iPhone/iPad.
Creating a checkin workflow
For my basic demonstration, I’ll use my home venue ID and a very basic shortcut. You only need two components:
- URL
- Get Contents of URL
First, you need to add the URL component, and add the following URL to it:
https://api.foursquare.com/v2/checkins/add?oauth_token=<your token>
Replace the <your token>with your token you obtained from Foursquare.
Next, you should add to the shortcut the “Get Contents of URL”. Expand the Advanced section, and set the Method to POST. The last step is to set the Request Body to Form, and add the following to parameters:
- v: 20180323
- veneueId: <venue_id>
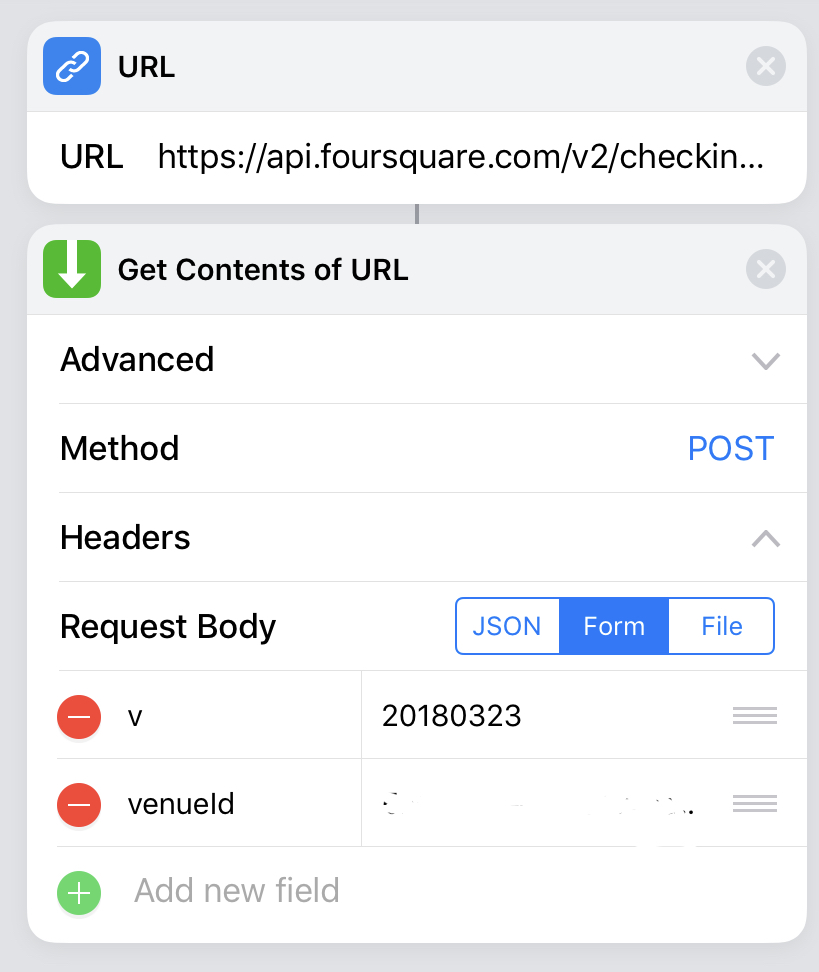
The “v” parameter is mandatory for Foursquare. This parameter contains a date string and marks the compatibility date with the API. The “venueId” (case sensitive) is the ID of the venue where you want to checkin. So if your setup is correct, start the shortcut. If the Shortcut ran without any errors, you will receive a very long JSON about the details of your checkin. Let’s check your checkin in Swarm app.
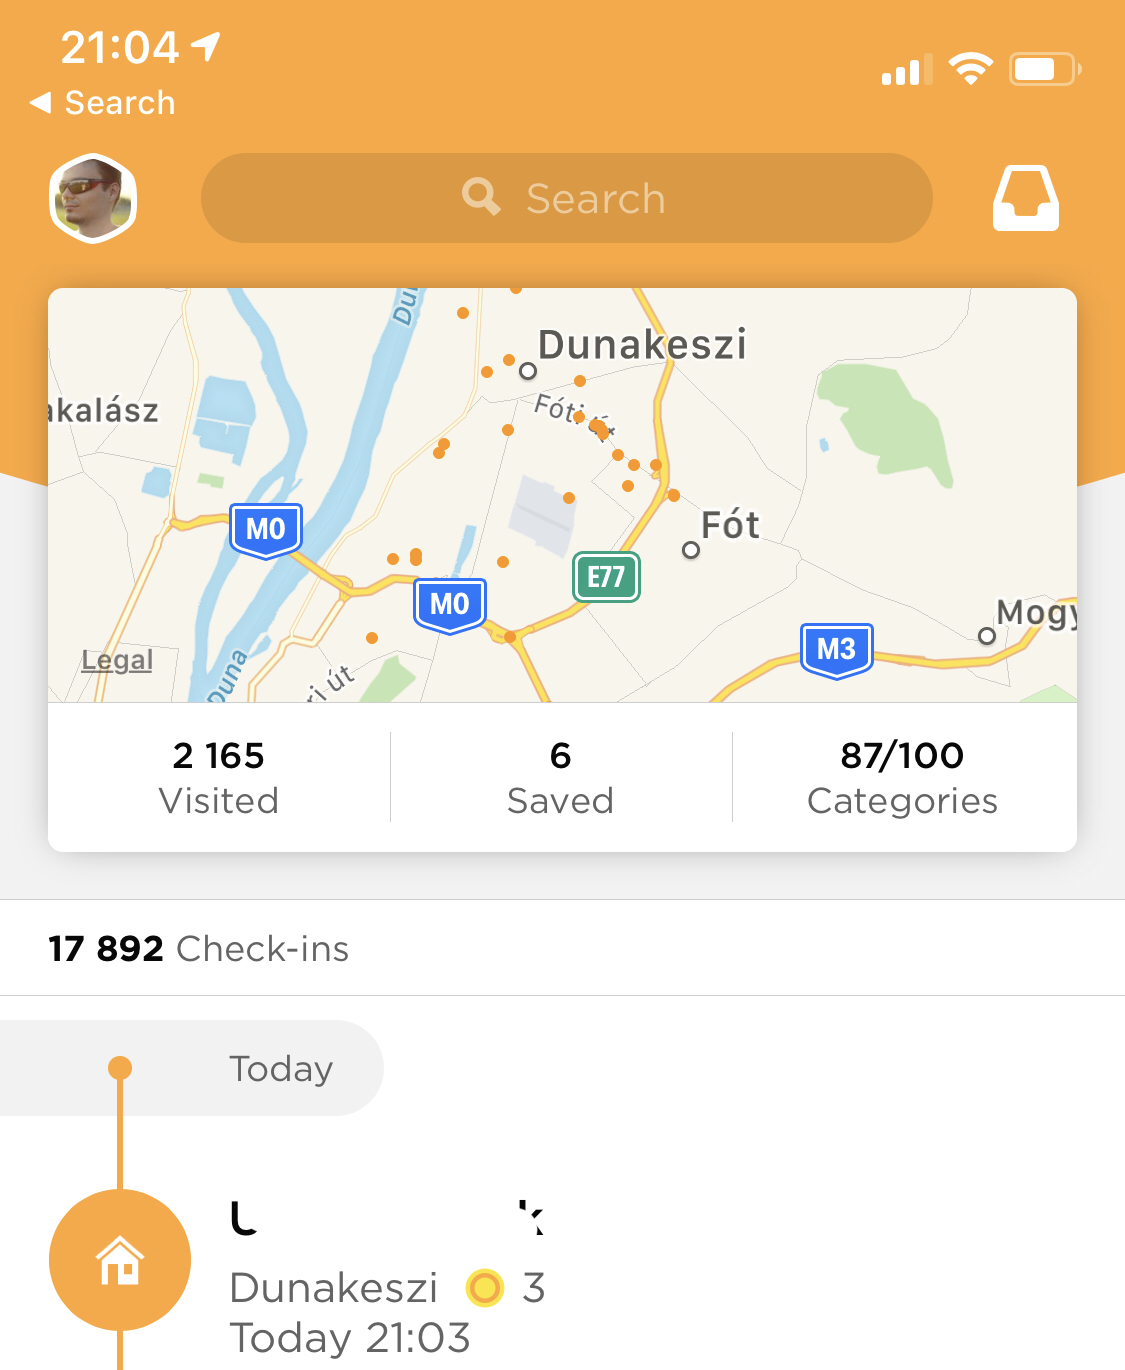
If you see your checkin as the last one in Swarm, you are done. All set up, now the only boundary is your imagination. Happy Shortcuts-ing… 🙂