Most of the times I need to validate, check or try something in IBM Security Directory Server (SDS) for customers, so I thought it’s time to create my own SDS playground instance in VMware. In this blog post, I’ll show you how to do so:
- Install Red Hat Enterprise Linux (RHEL) 7.5 in Vmware
- Configure RHEL to create a local repository
- Install IBM SDS prerequisite system packages
- Little OS tuning
- Installing and configuring SDS 6.4
- Apply fix on SDS 6.4 to the most recent version
- Apply fix on GSKit component to the most recent version
- Apply fix for Java component to the most recent version
- Apply fix for IBM DB2 to the most recent version
- Configure IBM DB2 to store LDAP data
- Configure suffix
- Install WebSphere Application Server (WAS) 9.0
- Apply fix on WAS 9.0 to the most recent version
- Configure system service for WAS to start/stop on OS start/stop
- Deploy and configure SDS administration web application to WAS
So, let’s get started.
Required resources
In order to create an SDS LDAP environment for yourself, you will need to get the following resources:
- A suitable host operating system like Windows 10 / macOS 10.14
- Internet access
- a working IBM ID (to download WAS updates from the Internet)
- VMware Workstation 12 / Fusion 8 or newer
- SSH client like PuTTY or Terminal / iTerm
- Installation resources:
- Operating system resources
- RHEL 7.5 installation DVD iso
- IBM SDS resources
- IBM SDS installation ISO file (this contains the base SDS 6.4 including DB2, Java and GSKit)
- IBM SDS update package: 6.4.0.16
- IBM GSKit update package: 8.0.50.89
- IBM Java update package: 8.0.5.15 FP15
- IBM DB2 update package: DB2 universal 10.5.0 FP10
- IBM WAS 9.0 installation ZIP file
- IBM SDK Technology Edition Version 8 installation file for WAS
- Operating system resources
Install RHEL 7.5
I will not cover a complete basic RHEL installation in this blog post, because it is quite simple, I just write down the recommended settings to create your basic RHEL installation.
Configure your new VM to have:
- at least 2 cores of CPU
- at least 2 GB or memory
- at least 40 GB of disk
You can safely remove the following hardware features:
- Sound card
- Printer
- Bluetooth
- Camera (default attached on macOS)
- Disable hardware graphic acceleration
During RHEL installation
- Make sure to enable and set properly NTP services.
- Make sure to properly set the hostname.
- Please disable Kdump and Security policies.
- Most convenient package group to install is Server with GUI or if you know what you are doing and know how X11 forward works, you can choose Minimal Install.
Configuring the operating system
Once you finished RHEL installation and you are already logged in as root, apply the following changes:
Disable SELinux
On a terminal, issue the following command:
sed -i 's/SELINUX=enforcing/SELINUX=disabled/g' /etc/selinux/config
Create local RPM repository (optional)
I really like to create a local RPM repository from the installation media because in the future if I need something, I can simply install it locally, rather than pursuing the installation media later.
Create the necessary directories:
mkdir -p /mnt/cd /opt/yum/rhel/repodata
Mount the RHEL installation ISO:
mount -o loop /dev/sr0 /mnt/cd
Copy the *.rpm and required *.xml files to the filesystem and then change to the new directory:
cp -a /mnt/cd/Packages/*.rpm /opt/yum/rhel
cp /mnt/cd/repodata/*comps*.xml /opt/yum/rhel/repodata/comps.xml
cd /opt/yum/rhel/
Install the required packages (if not already installed) to create a local repository:
rpm -i deltarpm-*.rpm createrepo-*.rpm python-deltarpm-*.rpm
Create the local repository (don’t miss the dot at the end):
createrepo -g repodata/comps.xml .
Create a yum file for the newly created local repository and update yum repository:
cat > /etc/yum.repos.d/rhel-local.repo << EOF
[rhel-local]
name=RHEL 7 local repository
baseurl=file:///opt/yum/rhel/
gpgcheck=1
gpgkey=file:///etc/pki/rpm-gpg/RPM-GPG-KEY-redhat-release
enabled=1
EOF

yum clean all
Umount the RHEL installation ISO:
umount /mnt/cd
Disabling unnecessary system services
On a terminal, issue the following command:
for i in abrt-ccpp abrtd atd auditd blk-availability certmonger cpuspeed cups mcelogd mdmonitor netconsole numad oddjobd portreserve rhnsd rhsmcertd smartd winbind postfix iptables ip6tables firewalld kdump; do systemctl disable $i; done
Clean up a little bit
On a terminal, issue the following command:
rm -vf /root/install.log
rm -vf /root/install.log.syslog
rm -vf /root/anaconda-ks.cfg
Install required system packages for IBM products and some useful ones as well
On a terminal, issue the following command:
yum -y install binutils compat-db.x86_64 compat-libstdc* compat-libstdc++-33.i686 compat-libstdc++-33.x86_64 elfutils-libelf elfutils-libelf-devel elfutils-libs.i686 elfutils-libs.x86_64 elfutils.x86_64 firefox ftp gcc gcc-c++ glibc-common glibc-devel glibc-headers glibc* gtk2-engines.x86_64 gtk2.i686 gtk2.x86_64 kernel-devel kernel-headers ksh ksh.x86_64 libaio libaio-devel libaio*i* libcanberra-gtk2.x86_64 libcyanberra-gtk2.i686 libgcc.i686 libgcc.x86_64 libgcc* libstdc*i* libstdc++.i686 libstdc++.x86_64 libXft.i686 libXft.x86_64 libXmu.i686 libXmu.x86_64 libXp libXp.i686 libXp.x86_64 libXp*i* libXtst.i686 libXtst.x86_64 make mc mlocate net-tools PackageKit-gtk3-module PackageKit-gtk3-module.i686 pam-devel pam-devel*i* pam.i686 pam.x86_64 rpm-build.x86_64 sg3_utils telnet unixODBC unixODBC-devel unixODBC*i* wget xauth xorg-x11-apps xorg-x11-xauth xterm
Configuring shared memory limit for IBM DB2:
On a terminal, issue the following command:
echo "kernel.shmmax=3221225472" >> /etc/sysctl.conf
Reboot
As a last step restart your image.
Copy installation and update files to the image
Once the VM has been restarted, copy all the installation and update files into the VM using SCP or drag and drop whatever you prefer. On my VM, I’ll use:
/opt/install
directory as a group folder, and inside it, I have the following directories and files inside them:
- DB2FIX
- v10.5fp10_linuxx64_universal_fixpack.tar.gz
- GSKITFIX
- 8.0.50.89-ISS-GSKIT-LinuxX64-FP0089.tar.gz
- JAVAFIX
- 8.0.5.15-ISS-JAVA-LinuxX64-FP0015.tar
- SDS
- sds64-linux-x86-64.iso
- SDSFIX
- 6.4.0.16-ISS-ISDS-LinuxX64-IF0016.tar.gz
- SDS_Premium_Feature
- sds64-premium-feature-act-pkg.zip
- WAS
- WAS_ND_V9.0_MP_ML.zip
- WASJAVA
- ibm-java-sdk-8.0-5.22-linux-x64-installmgr.zip
If you are eligible to install the SDS premium feature I recommend doing so because it is much easier to do it now rather than later.
Installing IBM Security Directory Server 6.4
So, now, hopefully we installed and configured the operating system, now we can start installing IBM SDS.
Install IBM Installation Manager
IBM Installation Manager (IM) is the right tool to get IBM SDS installed. This tool is responsible for product installation and updating products as well.
To begin the installation first you have to mount the IBM SDS ISO file using the following command as root:
mount -o loop /opt/install/SDS/sds64-linux-x86-64.iso /mnt/cd
Start the installer as root:
/mnt/cd/ibm_im_64bit/install
Follow the installation wizard to get IBM IM installed (default values will work). Once the installation finished, restart the IM clicking on the Restart Installation Manager button.
Update IBM Installation Manager
Since IBM SDS has been released 3 years ago, IBM provided many fix packs to its products including Installation Manager. To get the most recent version of IM (at the time of writing it is 1.8.9.1), follow the instructions below:
- Once the IM restarted, navigate to the File – Preferences menu.
- On the left-hand side, select Updates option, and check the checkbox labelled as Search for Installation Manager updates.
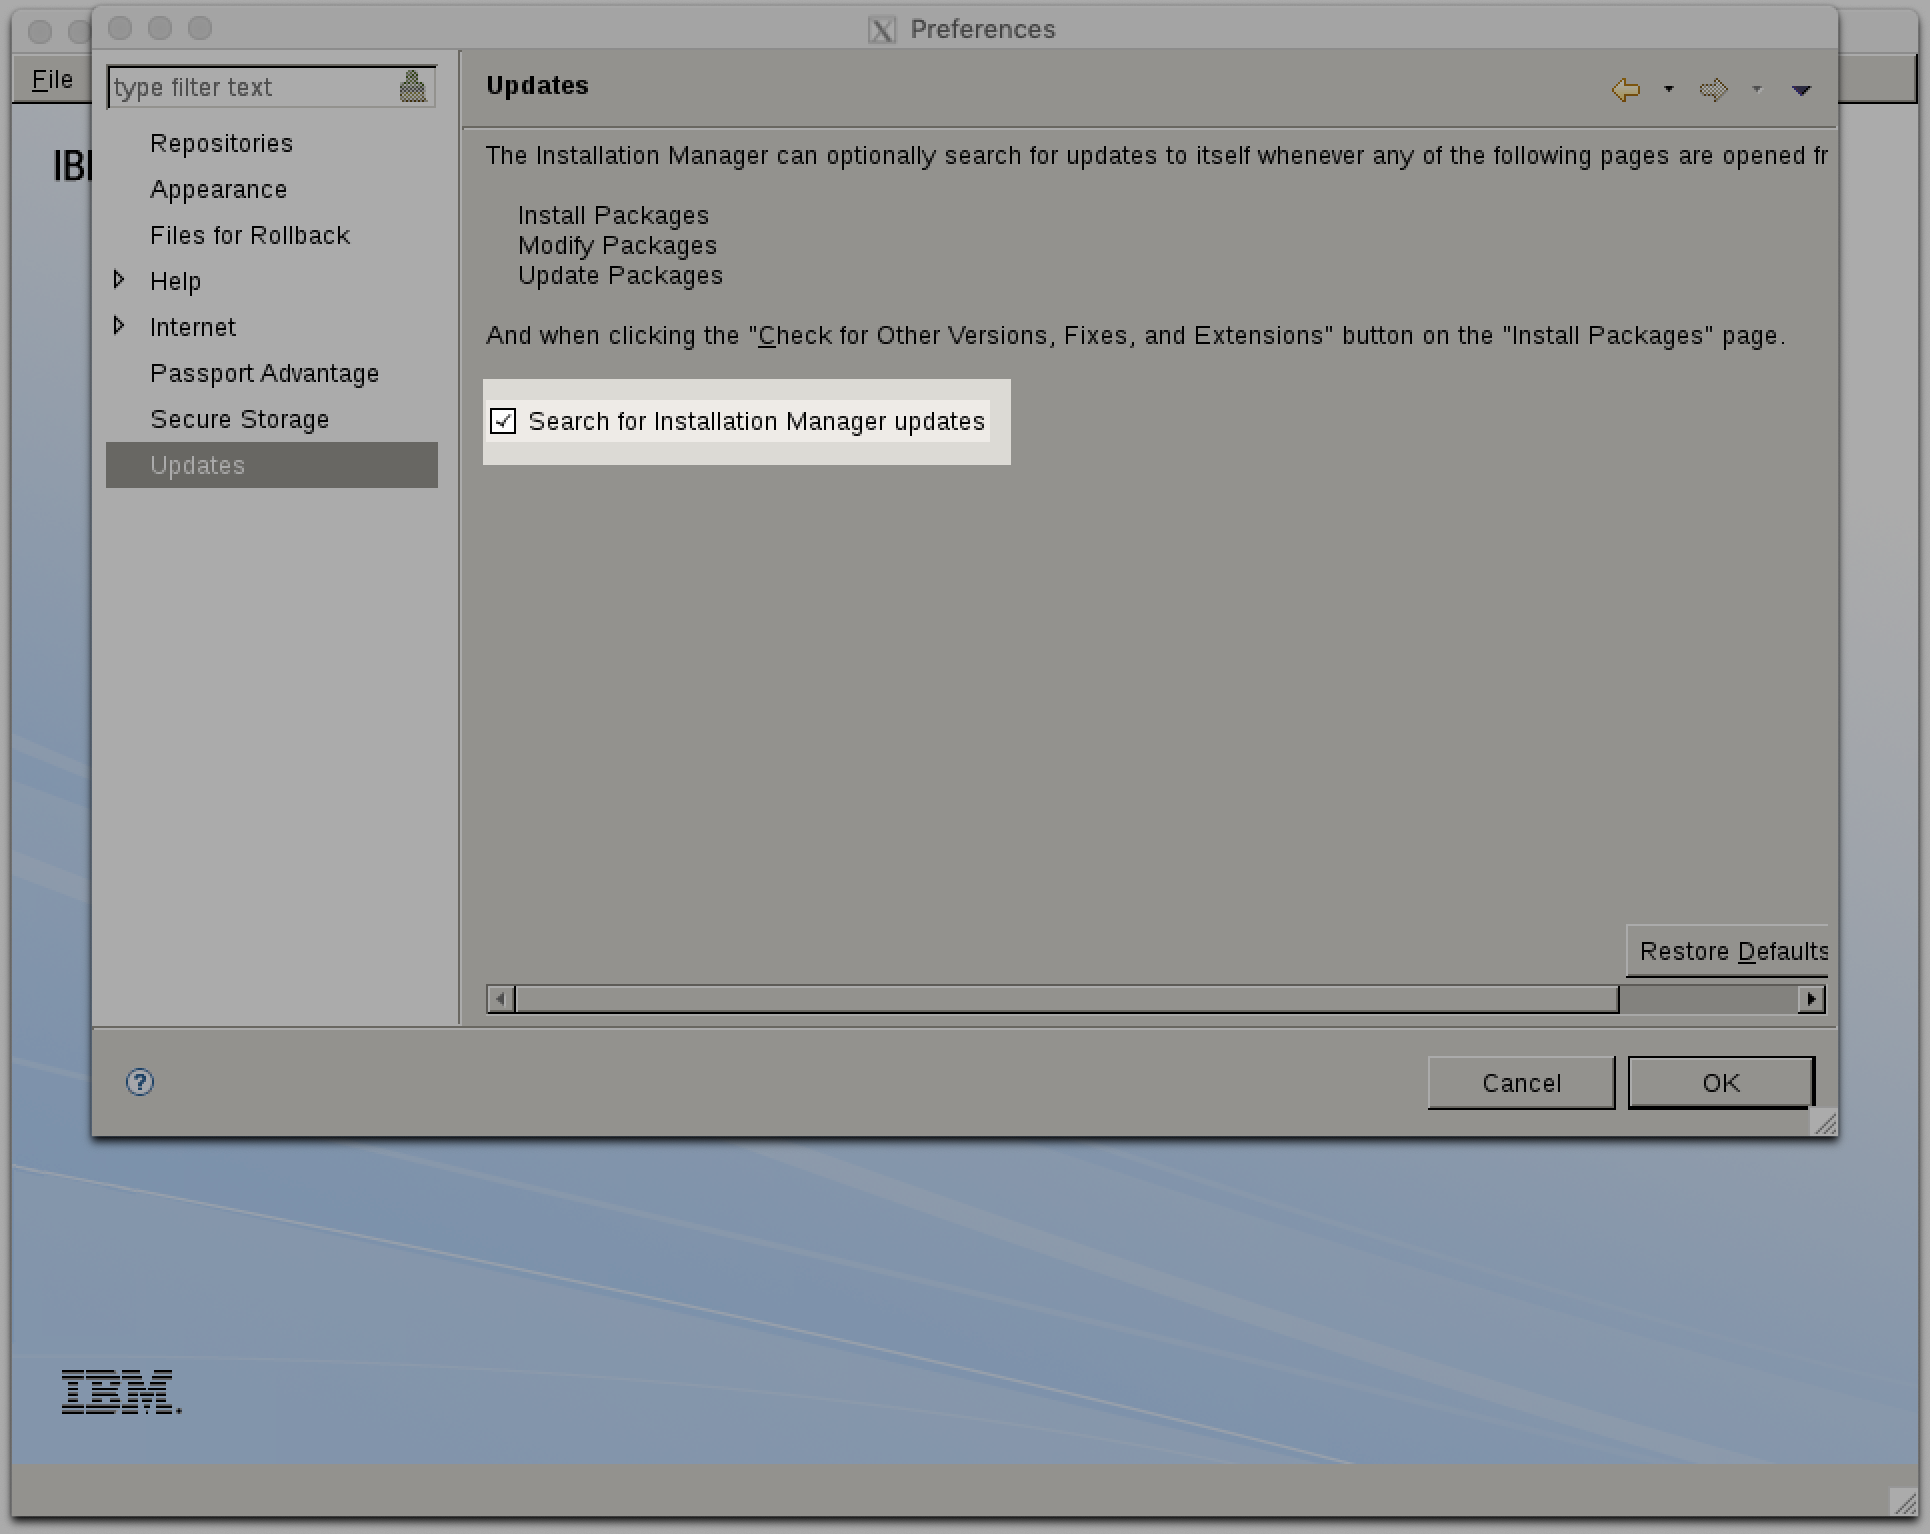
- Click button OK.
- On the main screen, select Update.
- A little bit later, IM will tell you, there is an update. Select Yes to download and apply the update.
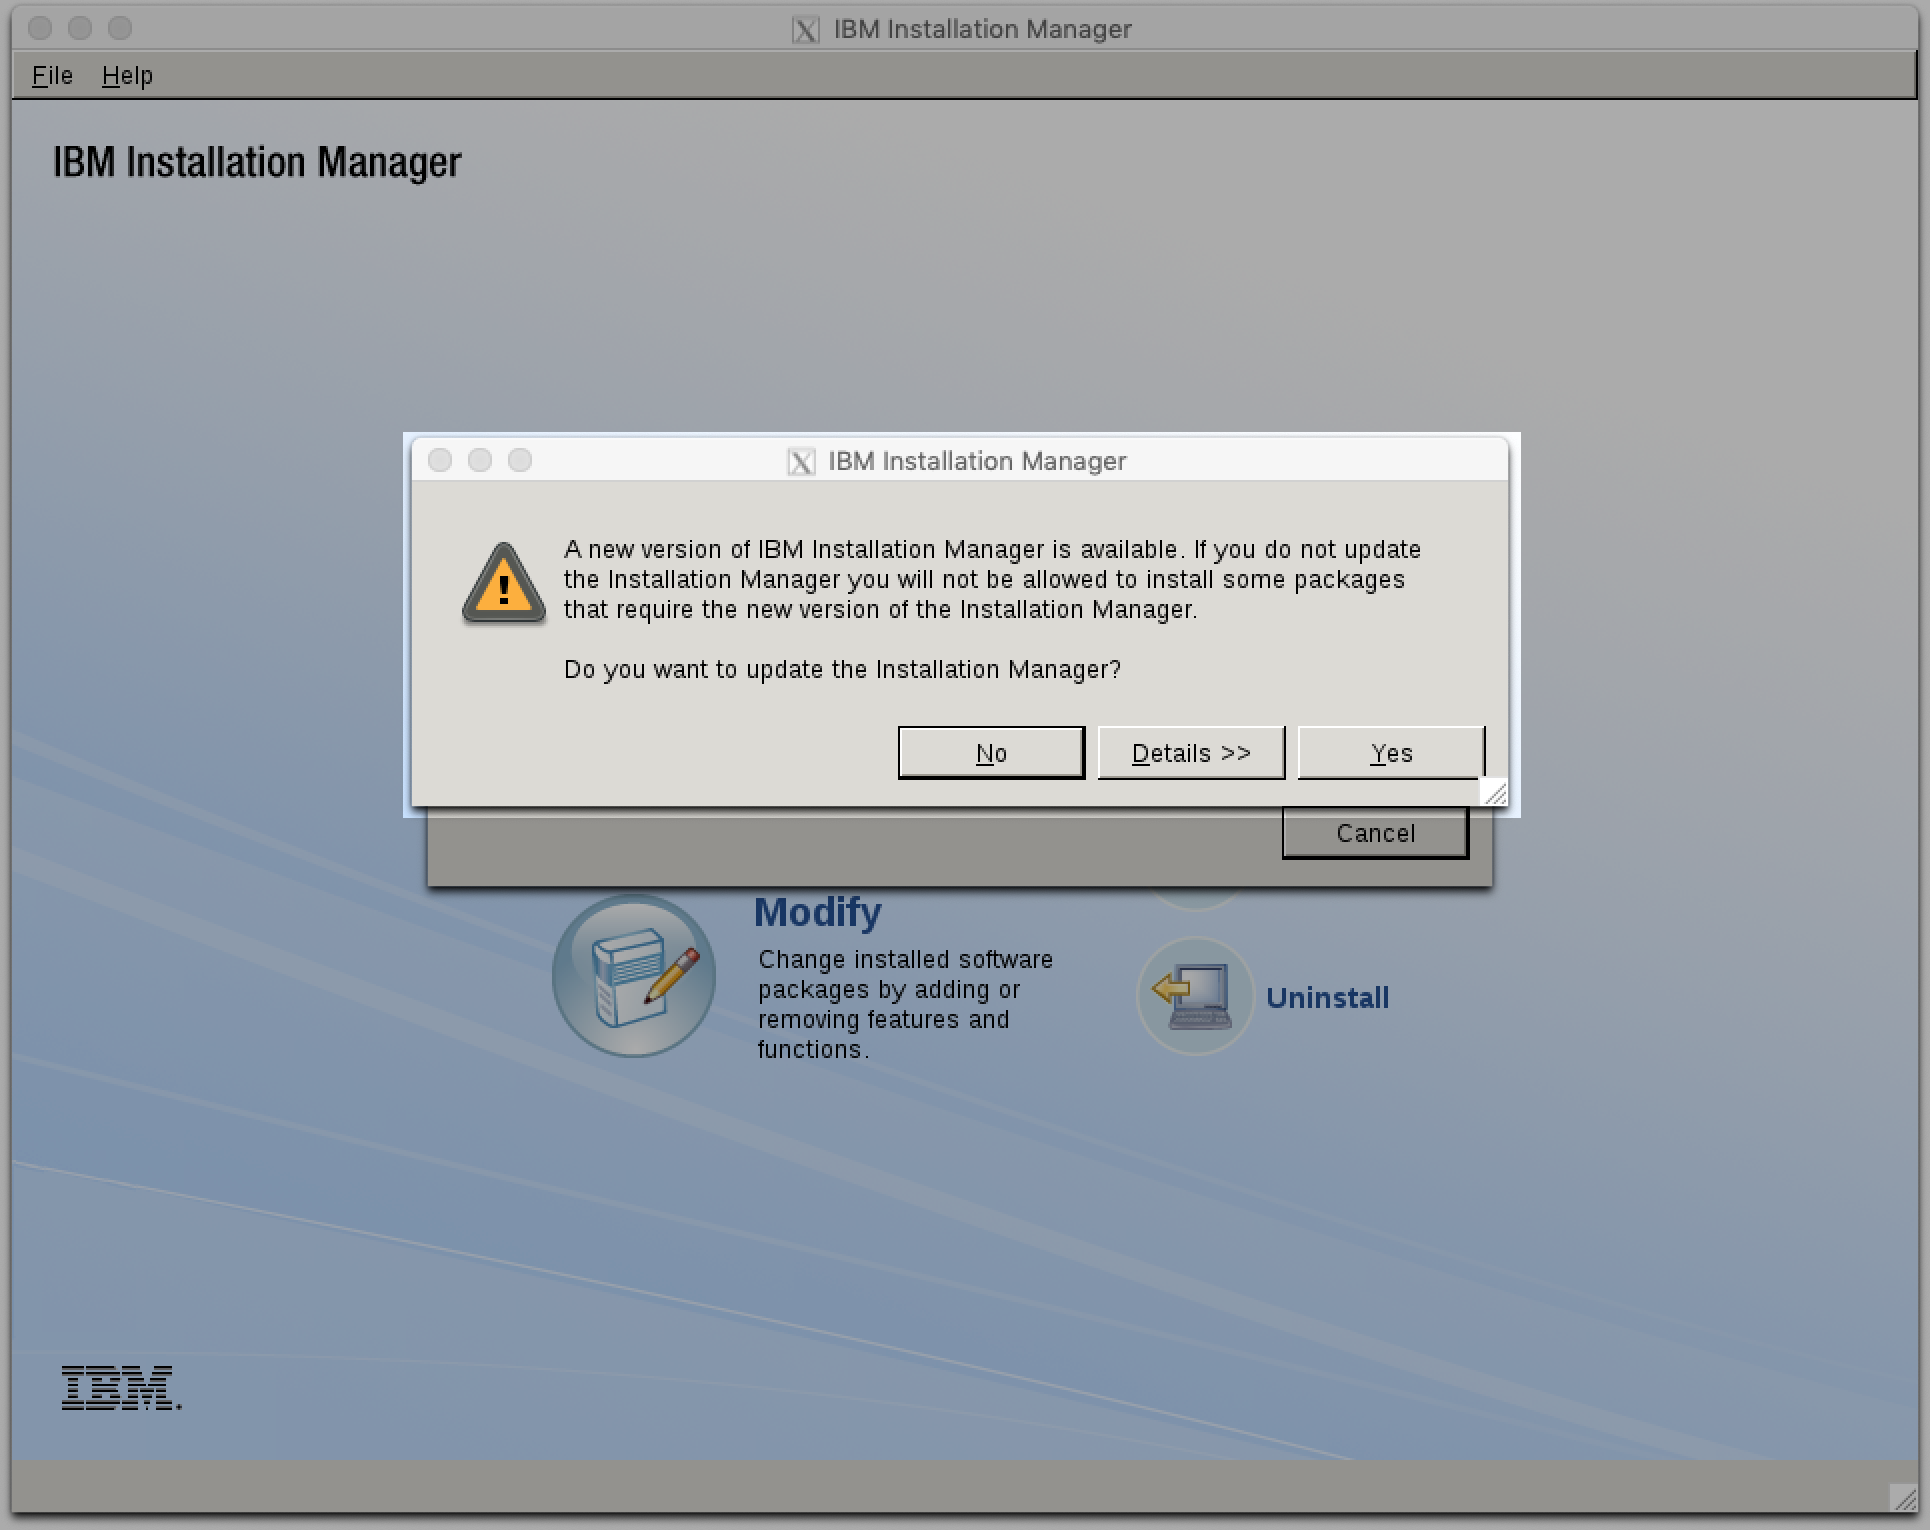
- Once the update finished, IM will restart automatically.
Install SDS 6.4
Now we are ready to install IBM SDS 6.4 base version to our system. Follow the instructions:
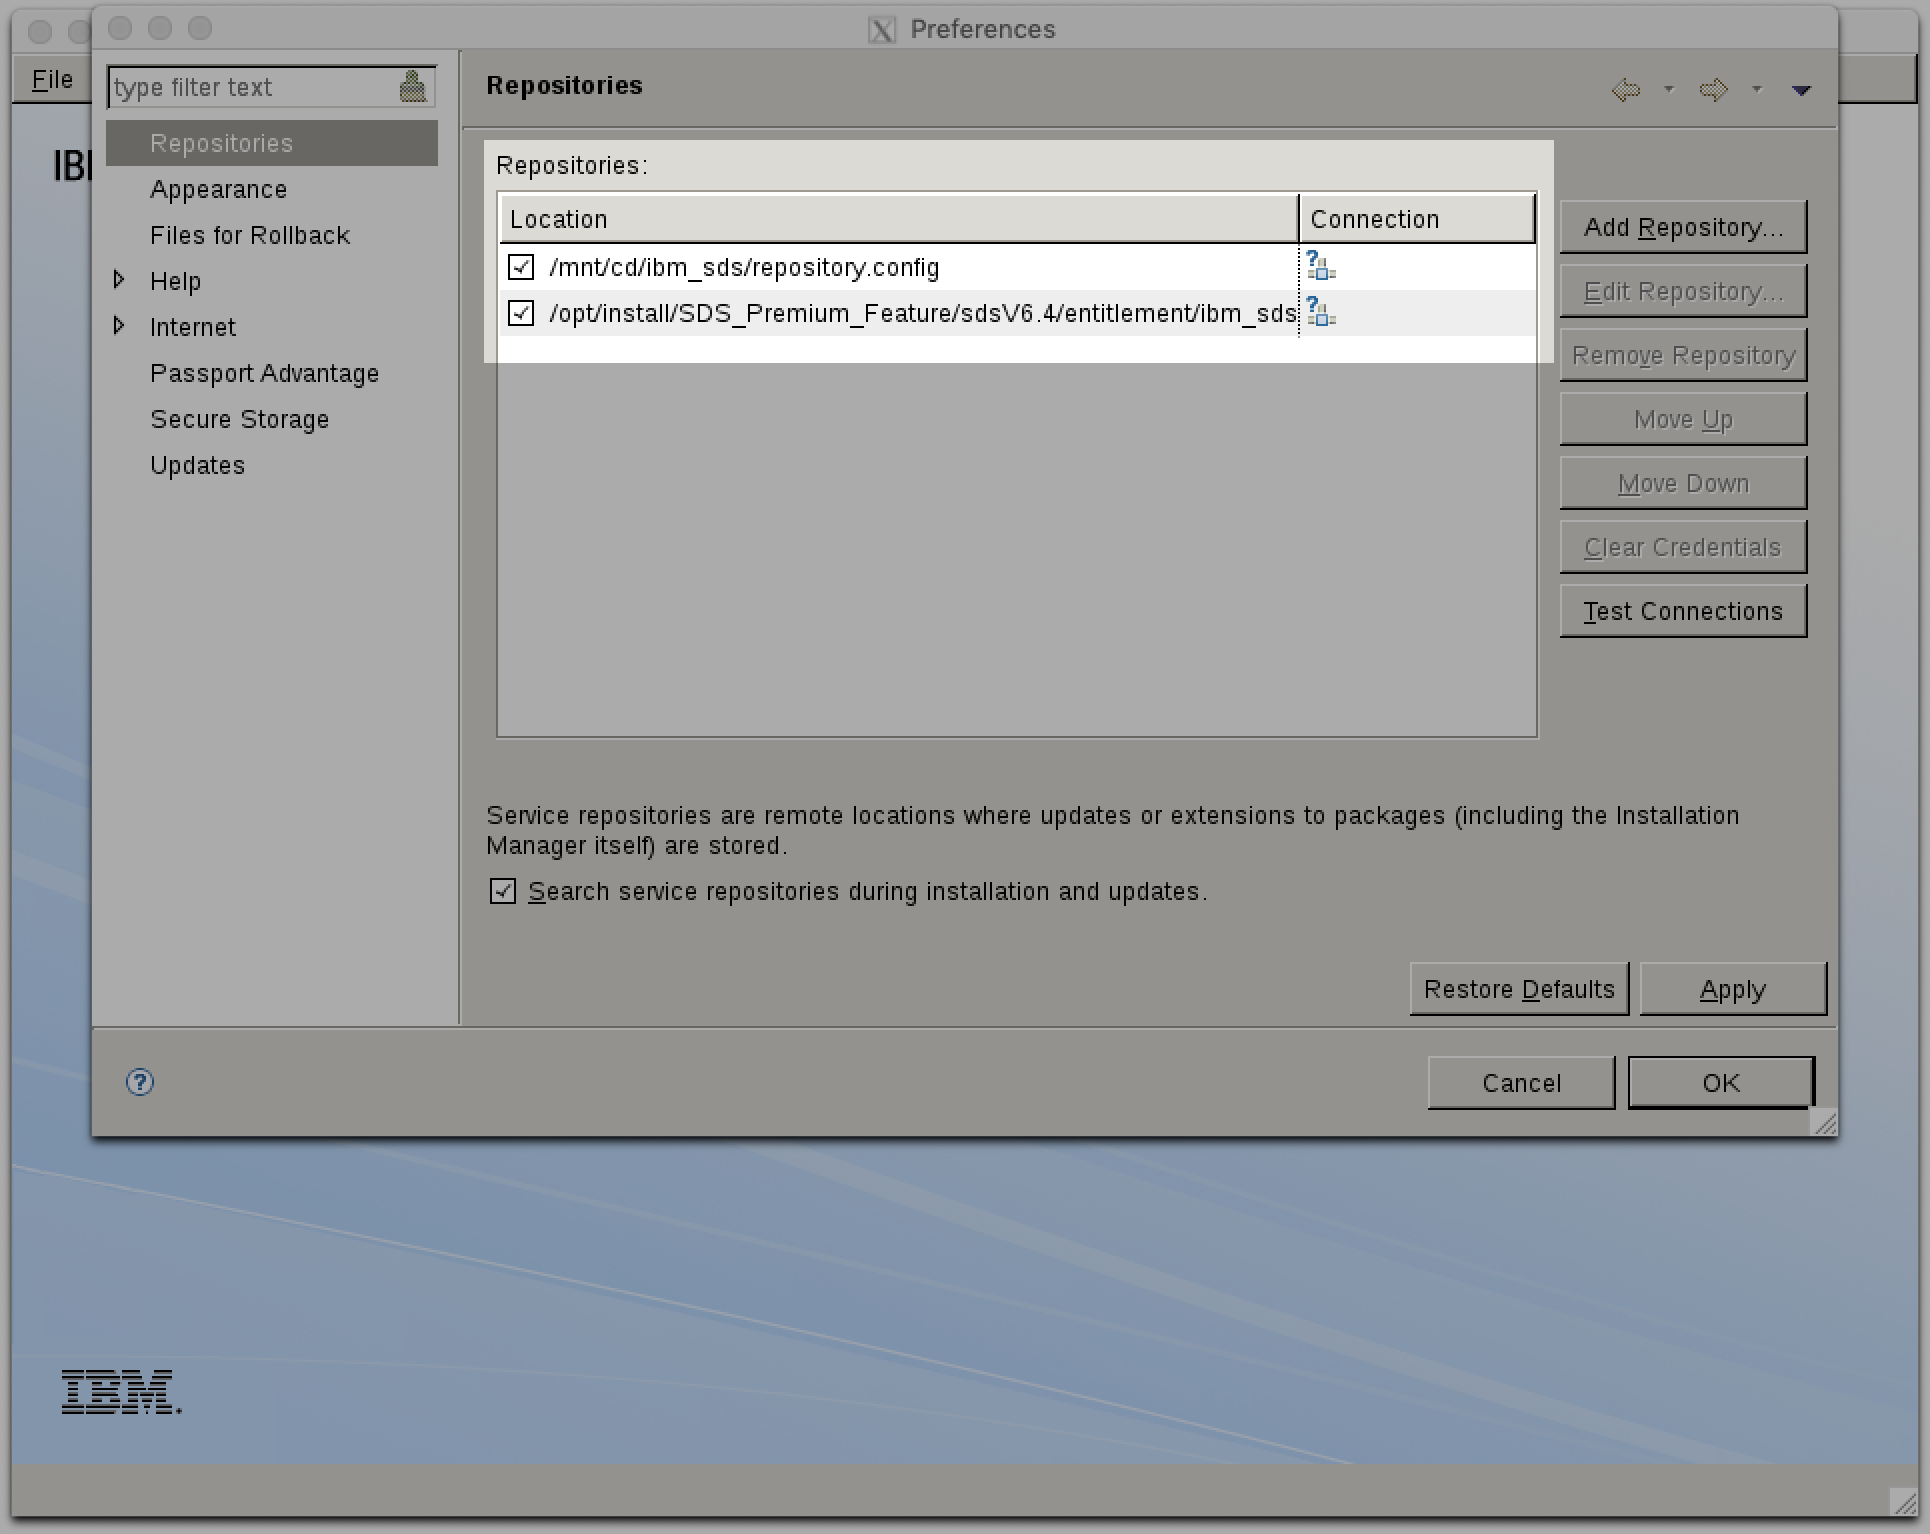
- Navigate to the File – Preferences menu.
- On the left-hand side, select Repositories option and on the right, click Add Repository…
In the File browser window, browse the repository.config file from the mounted ISO location:
/mnt/cd/ibm_sds/repository.config
Click button OK in the file browser and the Preferences window as well.
Optional:
If you are eligible to install the SDS Premium feature, follow the instructions below:
- Navigate to the premium feature install directory and extract the file’s content:
cd /opt/install/SDS_Premium_Feature
unzip sds64-premium-feature-act-pkg.zip
- Repeat the steps below and add the Premium Feature repository.config file to the IM as well.
/opt/install/SDS_Premium_Feature/sdsV6.4/entitlement/ibm_sds_ent/repository.config
You should have something like this:
On the main screen, click Install.
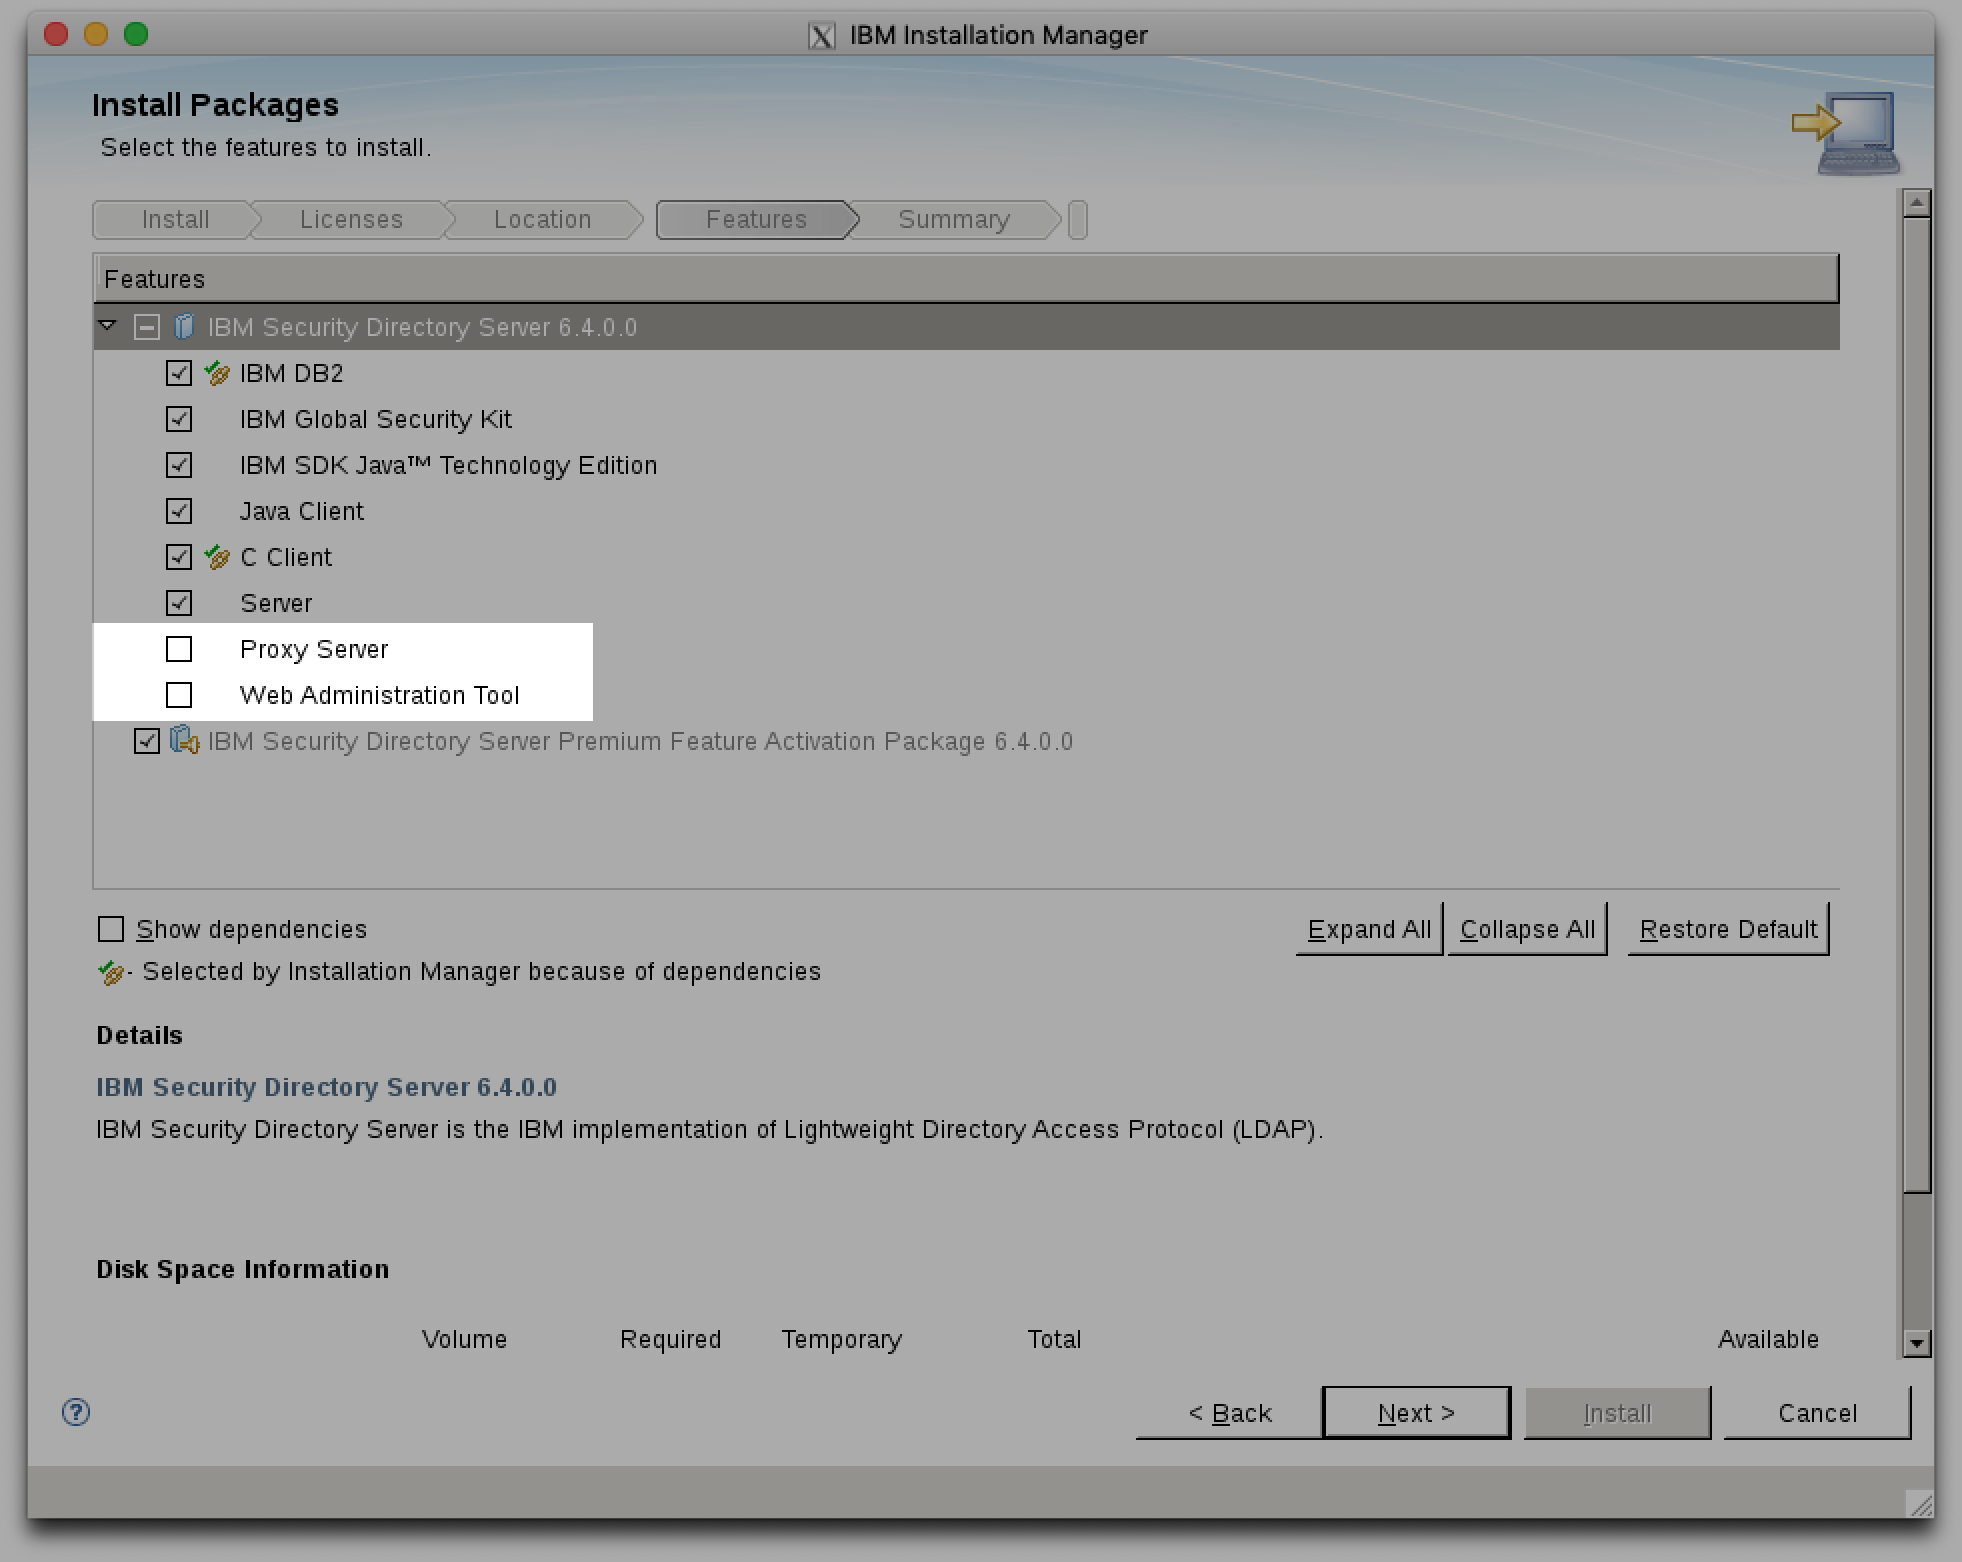
Hopefully IBM Security Directory Server V6.4 will appear in the available installable component. Select all the options and then click button Next. Follow the installation wizard.
When you see the features to install window, make sure to check Proxy Server and Web Administration Tools under IBM Security Directory Server 6.4.0.0.
On the next page, the wizard will ask the location of IBM DB2, GSKit and Java. Provide the following directory locations from the mounted ISO:
- DB2: /mnt/cd/ibm_db2
- GSKit: /mnt/cd/ibm_gskit
- Java: /mnt/cd/ibm_jdk/6.0.16.2-ISS-JAVA-LinuxX64-FP0002.tar
- Web Administration Tool: select Deploy manually later
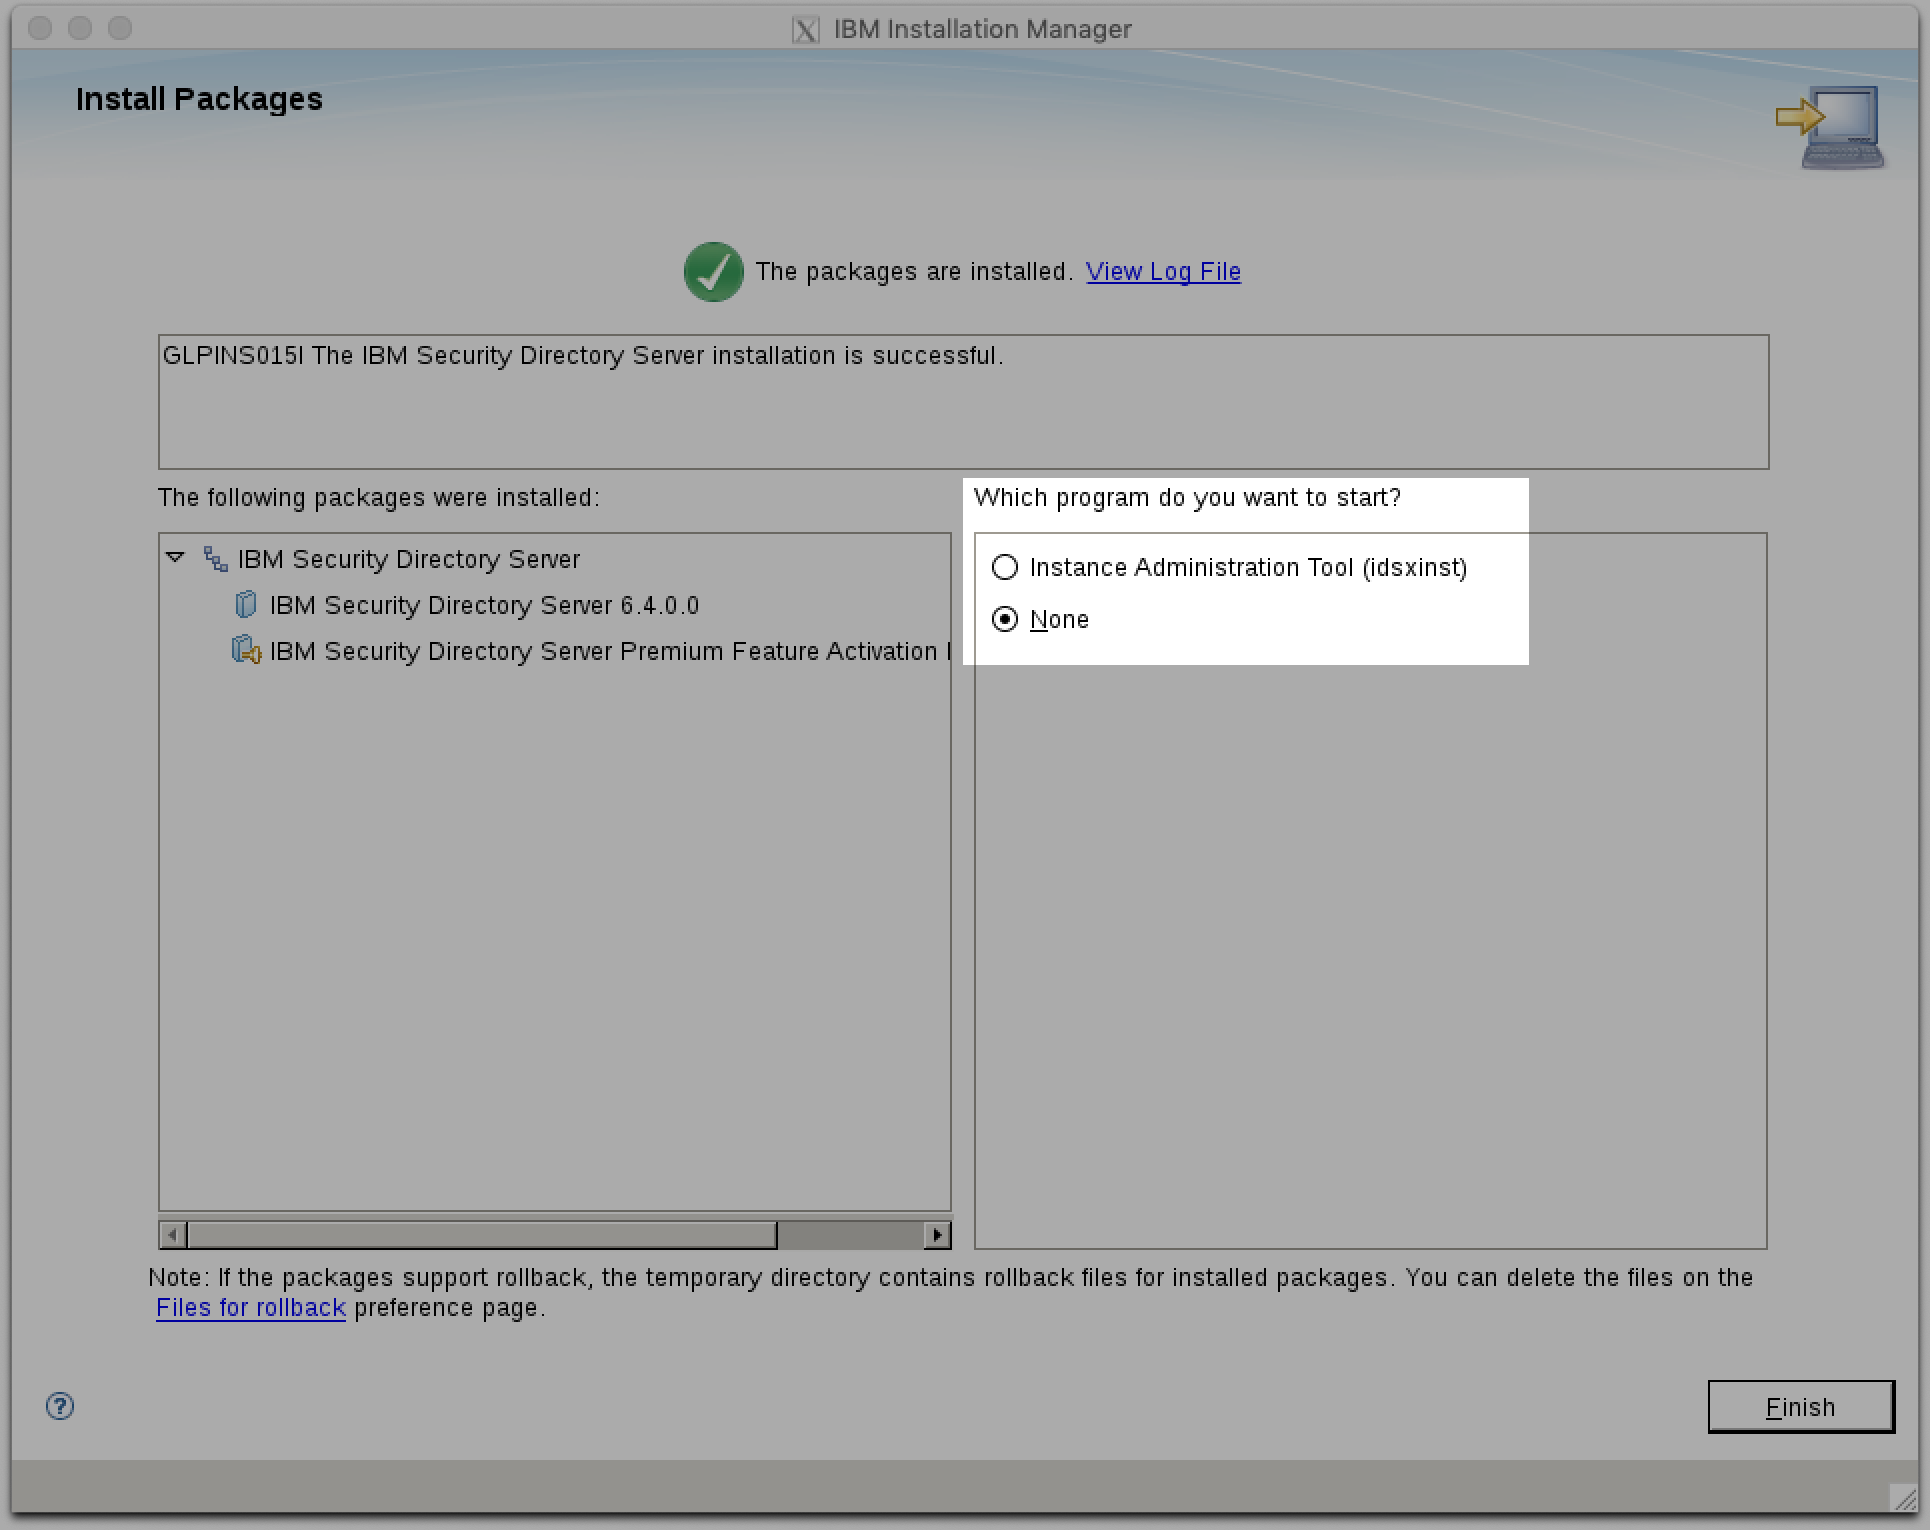
Kick off the installation process. Once the installation finished, do not let IM to start the Instance Administration Tool. Simply choose option None.
Go back to Files – Preferences in IM, and remove the configured repositories, then quit IM.
Before we move on to install fixes, let’s do some housekeeping and unmount the installation ISO and remove the unnecessary files as well:
umount /mnt/cd
rm -rf /opt/install/SDS
Optional
rm -rf /opt/install/SDS_Premium_Feature
Apply latest fix pack on SDS 6.4
So far, we have installed RHEL and the base version of IBM SDS 6.4. Since – as I mentioned before – SDS released more than 3 years ago, some fixes need to be applied.
The current fix pack for SDS 6.4 is FP16. To apply the fix, follow the instructions in a terminal as root:
Extract the update package and delete the compressed file:
cd /opt/install/SDSFIX/
tar -xvf 6.4.0.16-ISS-ISDS-LinuxX64-IF0016.tar.gz
rm -rf 6.4.0.16-ISS-ISDS-LinuxX64-IF0016.tar.gz
cd 6.4.0.16-ISS-ISDS-LinuxX64-IF0016
To start the update process, issue the following command from the extracted directory:
./idsinstall -u -f
Once the update is finished, check that the new version is applied:
rpm -qa | grep idsldap
The command will print a lot of information on the screen, check the first line of the output, and it should match with:
idsldap-srvbase64bit64-6.4.0-16.x86_64
Clean up the temporary directory and the fix pack as well:
rm -rf /opt/install/SDSFIX
Apply latest fix pack on GSKit
The current fix pack for GSKit is 8.0.50.89. To apply the fix, follow the instructions in a terminal as root:
Extract the update package and delete the compressed file:
cd /opt/install/GSKITFIX
tar -xvf 8.0.50.89-ISS-GSKIT-LinuxX64-FP0089.tar.gz
rm -rf 8.0.50.89-ISS-GSKIT-LinuxX64-FP0089.tar.gz
Update 32-bit GSkit packages:
rpm -Uhv 8.0.50.89-ISS-GSKIT-LinuxX64-FP0089/32/*.rpm
Update 64-bit GSkit packages:
rpm -Uhv 8.0.50.89-ISS-GSKIT-LinuxX64-FP0089/64/*.rpm
Check that the new version is applied with command:
gsk8ver_64
The command will print a lot of information on the screen, pick a block and locate any lines that starts with @(#)FileVersion and check the version to match 8.0.50.89
Clean up the temporary directory and the fix pack as well:
rm -rf /opt/install/GSKITFIX
Apply latest fix pack on Java
The current fix pack for Java is 8.0.5.15 FP15. To apply the fix, follow the instructions in a terminal as root:
Create a backup of the installed Java before updating:
mv /opt/ibm/ldap/V6.4/java /opt/ibm/ldap/V6.4/java_old
Extract the update package and delete the compressed file:
cd /opt/install/JAVAFIX
tar -xvf 8.0.5.15-ISS-JAVA-LinuxX64-FP0015.tar
rm -rf 8.0.5.15-ISS-JAVA-LinuxX64-FP0015.tar
Move the extracted Java directory to the SDS binary directory:
mv /opt/install/JAVAFIX/java/ /opt/ibm/ldap/V6.4/
Verify the move command’s output by issuing:
ls -l /opt/ibm/ldap/V6.4
You should have an output where java and java_old directories are co-existing. If you do so, check the version of Java:
/opt/ibm/ldap/V6.4/java/bin/java -version
Check the second line of the output, it should match with:
Java(TM) SE Runtime Environment (build 8.0.5.15 - pxa6480sr5fp15-20180502_01(SR5 FP15))
Clean up the temporary directory:
rm -rf /opt/install/JAVAFIX
Apply latest fix pack on IBM DB2
IBM SDS default installation media contains a fully featured IBM DB2 10.5 FP4 (or so called 10.5.0.4) installed onto the system during SDS basic installation.
You can check using the db2ls command:
db2ls
and the output will be:
Install Path                     Level
---------------------------------------------------------------
/opt/ibm/sdsV6.4db2              10.5.0.4
Because we applied FP16 on SDS, IBM recommends updating the underlying DB2 to the supported version: 10.5 FP10 (or so called: DB2 10.5.0.10).
Extract the update package and delete the compressed file:
cd /opt/install/DB2FIX/
tar -xvf v10.5fp10_linuxx64_universal_fixpack.tar.gz
rm -rf v10.5fp10_linuxx64_universal_fixpack.tar.gz
Start the fix pack installation:
universal/installFixPack
The first question you need to tell, where is your DB2 installed. Since we checked the version previously, it reports the installation path:
/opt/ibm/sdsV6.4db2
so, provide this to the installer. The second question is about do you want to install the fix in place, or you want to provide a new directory. I didn’t want to create a separate folder, I want to install into the same directory, so I provided answer no.
Once your DB2 fix is installed, you can check again the version using the db2ls command, and hopefully the output will be something like this:
Install Path                     Level
---------------------------------------------------------------
/opt/ibm/sdsV6.4db2              10.5.0.10
Clean up the temporary directory:
rm -rf /opt/install/DB2FIX/
Configuring SDS 6.4
Until now, we installed RHEL operating system and IBM SDS 6.4 including fixes for IBM SDS and its components. Now we are finally ready to create our SDS instance.
What is an instance
IBM provides the possibility, to create multiple LDAP instances on the same installed binary. So technically the binary is the product files and resources and the instance is an actual configuration running on the binaries.
Create an SDS instance
To create our default and very first SDS LDAP server instance, use the commands below on a terminal as root:
cd /opt/ibm/ldap/V6.4/sbin
./idsicrt -I idsldap -a 3538 -c 3539 -e "EncryptionSeed123" -g "EncSalt12345" -p 389 -s 686
Where:
- -I name of SDS instance
- -a admin server port
- -c admin server secure port
- -e encryption seed
- -g encryption salt
- -p ldap port (ldap://)
- -s ldap secure port (ldaps://)
When you receive a question „Do you want to…” pick option 1 and let the system finish the task.
[root@sds64 sbin]# ./idsicrt -I idsldap -a 3538 -c 3539 -e "EncryptionSeed123" -g "EncSalt12345" -p 389 -s 686
GLPWRP123I The program '/opt/ibm/ldap/V6.4/sbin/64/idsicrt' is used with the following arguments 'idsicrt -I idsldap -a 3538 -c 3539 -e ***** -g ***** -p 389 -s 686'.
You have chosen to perform the following actions:

GLPICR020I A new directory server instance 'idsldap' will be created.
GLPICR057I The directory server instance will be created at: '/home/idsldap'.
GLPICR013I The directory server instance's port will be set to '389'.
GLPICR014I The directory server instance's secure port will be set to '686'.
GLPICR015I The directory instance's administration server port will be set to '3538'.
GLPICR016I The directory instance's administration server secure port will be set to '3539'.
GLPICR019I The description will be set to: 'IBM Security Directory Server Instance V6.4'.
GLPICR021I Database instance 'idsldap' will be configured.

Do you want to....
(1) Continue with the above actions, or
(2) Exit without making any changes:1


GLPICR028I Creating directory server instance: 'idsldap'.
GLPICR025I Registering directory server instance: 'idsldap'.
GLPICR026I Registered directory server instance: : 'idsldap'.
GLPICR049I Creating directories for directory server instance: 'idsldap'.
GLPICR050I Created directories for directory server instance: 'idsldap'.
GLPICR043I Creating key stash files for directory server instance: 'idsldap'.
GLPICR044I Created key stash files for directory server instance: 'idsldap'.
GLPICR040I Creating configuration file for directory server instance: 'idsldap'.
GLPICR041I Created configuration file for directory server instance: 'idsldap'.
GLPICR034I Creating schema files for directory server instance: 'idsldap'.
GLPICR035I Created schema files for directory server instance: 'idsldap'.
GLPICR037I Creating log files for directory server instance: 'idsldap'.
GLPICR038I Created log files for directory server instance: 'idsldap'.
GLPICR088I Configuring log files for directory server instance: 'idsldap'.
GLPICR089I Configured log files for directory server instance: 'idsldap'.
GLPICR085I Configuring schema files for directory server instance: 'idsldap'.
GLPICR086I Configured schema files for directory server instance: 'idsldap'.
GLPICR073I Configuring ports and IP addresses for directory server instance: 'idsldap'.
GLPICR074I Configured ports and IP addresses for directory server instance: 'idsldap'.
GLPICR077I Configuring key stash files for directory server instance: 'idsldap'.
GLPICR078I Configured key stash files for directory server instance: 'idsldap'.
GLPICR046I Creating profile scripts for directory server instance: 'idsldap'.
GLPICR047I Created profile scripts for directory server instance: 'idsldap'.
GLPICR069I Adding entry to /etc/inittab for the administration server for directory instance: 'idsldap'.
GLPICR070I Added entry to /etc/inittab for the administration server for directory instance: 'idsldap'.
GLPICR118I Creating runtime executable for directory server instance: 'idsldap'.
GLPICR119I Created runtime executable for directory server instance: 'idsldap'.
GLPCTL074I Starting admin server for directory server instance: 'idsldap'.
GLPCTL075I Started admin server for directory server instance: 'idsldap'.
GLPICR029I Created directory server instance: : 'idsldap'.
GLPICR031I Adding database instance 'idsldap' to directory server instance: 'idsldap'.
GLPCTL002I Creating database instance: 'idsldap'.
GLPCTL003I Created database instance: 'idsldap'.
GLPICR133I Setting the DB2 registry for database instance 'idsldap' to allow DB2 SELECTIVITY.
GLPICR134I The DB2 registry for database instance 'idsldap' has been set to allow DB2 SELECTIVITY.
GLPCTL017I Cataloging database instance node: 'idsldap'.
GLPCTL018I Cataloged database instance node: 'idsldap'.
GLPCTL008I Starting database manager for database instance: 'idsldap'.
GLPCTL009I Started database manager for database instance: 'idsldap'.
GLPCTL049I Adding TCP/IP services to database instance: 'idsldap'.
GLPCTL050I Added TCP/IP services to database instance: 'idsldap'.
GLPICR081I Configuring database instance 'idsldap' for directory server instance: 'idsldap'.
GLPICR082I Configured database instance 'idsldap' for directory server instance: 'idsldap'.
GLPICR052I Creating DB2 instance link for directory server instance: 'idsldap'.
GLPICR053I Created DB2 instance link for directory server instance: 'idsldap'.
GLPICR032I Added database instance 'idsldap' to directory server instance: 'idsldap'.
[root@sds64 sbin]#
Your instance is created; however, it is not operational yet, because of the missing database configuration.
Configure instance database
We need a database configuration for the newly created instance to be able to store the LDAP structure. But before we do so, we need to set a password to our newly created OS user called idsldap.
passwd idsldap
and provide the user’s password twice.
To finish database configuration, navigate to the SDS binary folder’s /sbin directory:
cd /opt/ibm/ldap/V6.4/sbin
Issue the following command to set up database usage for instance:
./idscfgdb -n -I idsldap -a idsldap -t idsldap -w password -l /home/idsldap/
Where:
- -n run in no prompt mode (required to -w)
- -I (capital i) name of SDS instance (must match the value with you used in the previous command)
- -a DB2 admin ID
- -l location where database instance data will be stored
- -t name of the database
- -w password of DB2 admin ID
Your instance is configured to use DB2 database. The next step is to create the primary administrator for the instance.
Create primary administrator
Navigate to the SDS binary folder’s /sbin directory:
cd /opt/ibm/ldap/V6.4/sbin
Configure the primary administrator for idsldap SDS instance:
./idsdnpw -I idsldap -u cn=root -p password
Where:
- -I (capital i) name of SDS instance (must match the value that you used in the previous command)
- -u the name of the primary instance administrator (best practice to use cn=root)
- -p the password value for user cn=root
Your instance configuration requires one more but last step: create a suffix and its object.
Creating a suffix
Creating top-level entry (also called suffix) is your entry point in your directory structure. Usually it contains the company name and a country code, i.e.: o=ibm,c=us. Without this top-level entry, you can’t create objects in the directory structure.
To create the entry, navigate to the SDS binary folder’s /sbin directory:
cd /opt/ibm/ldap/V6.4/sbin
Then create the entry:
./idscfgsuf -I idsldap -s o=ibm,c=hu
Where:
- -I (capital i) name of SDS instance (must match the value that you used in the previous command)
- -s the top-level entry (suffix) string to be added
Now we created the so-called registry info about our suffix. But there is no physical representation behind it, which means, the directory server knows about this suffix, but it does not know, who to handle and where to store information (currently it is useless). To create the object representing the suffix we need to create an LDIF file with the following information:
dn: o=ibm,c=hu
objectclass: organization
o: ibm
To do so, issue the following command:
cat > /opt/install/suffix.ldif << EOF
dn: o=ibm,c=hu
objectclass: organization
o: ibm
EOF
Once the file is created, let’s load into our instance. First, we need to start the instance:
cd /opt/ibm/ldap/V6.4/sbin
./ibmslapd -I idsldap -n
Then load the suffix into the system use the command below and when you get asked, provide the cn=root user’s password:
cd /opt/ibm/ldap/V6.4/bin
./idsldapadd -D cn=root -w ? -i /opt/install/suffix.ldif
Your instance is now ready for use. You can start the server, stop the server, add entries, and read entries already added to it using the LDAP protocol.
Installing and configuring IBM WebSphere Application Server 9.0
Install and update WAS 9.0
To be able to use the SDS administration web application, you have to deploy it onto a J2EE application server, like WebSphere Application Server (WAS). To do so, first we need to install WAS. We will use the IBM Installation Manager to achieve it.
Extract the installation packages and delete the compressed files:
cd /opt/install/WAS/
unzip WAS_ND_V9.0_MP_ML.zip
rm -rf WAS_ND_V9.0_MP_ML.zip
cd /opt/install/WASJAVA/
unzip ibm-java-sdk-8.0-5.22-linux-x64-installmgr.zip
rm -rf ibm-java-sdk-8.0-5.22-linux-x64-installmgr.zip
Start IBM Installation Manager:
/opt/IBM/InstallationManager/eclipse/IBMIM
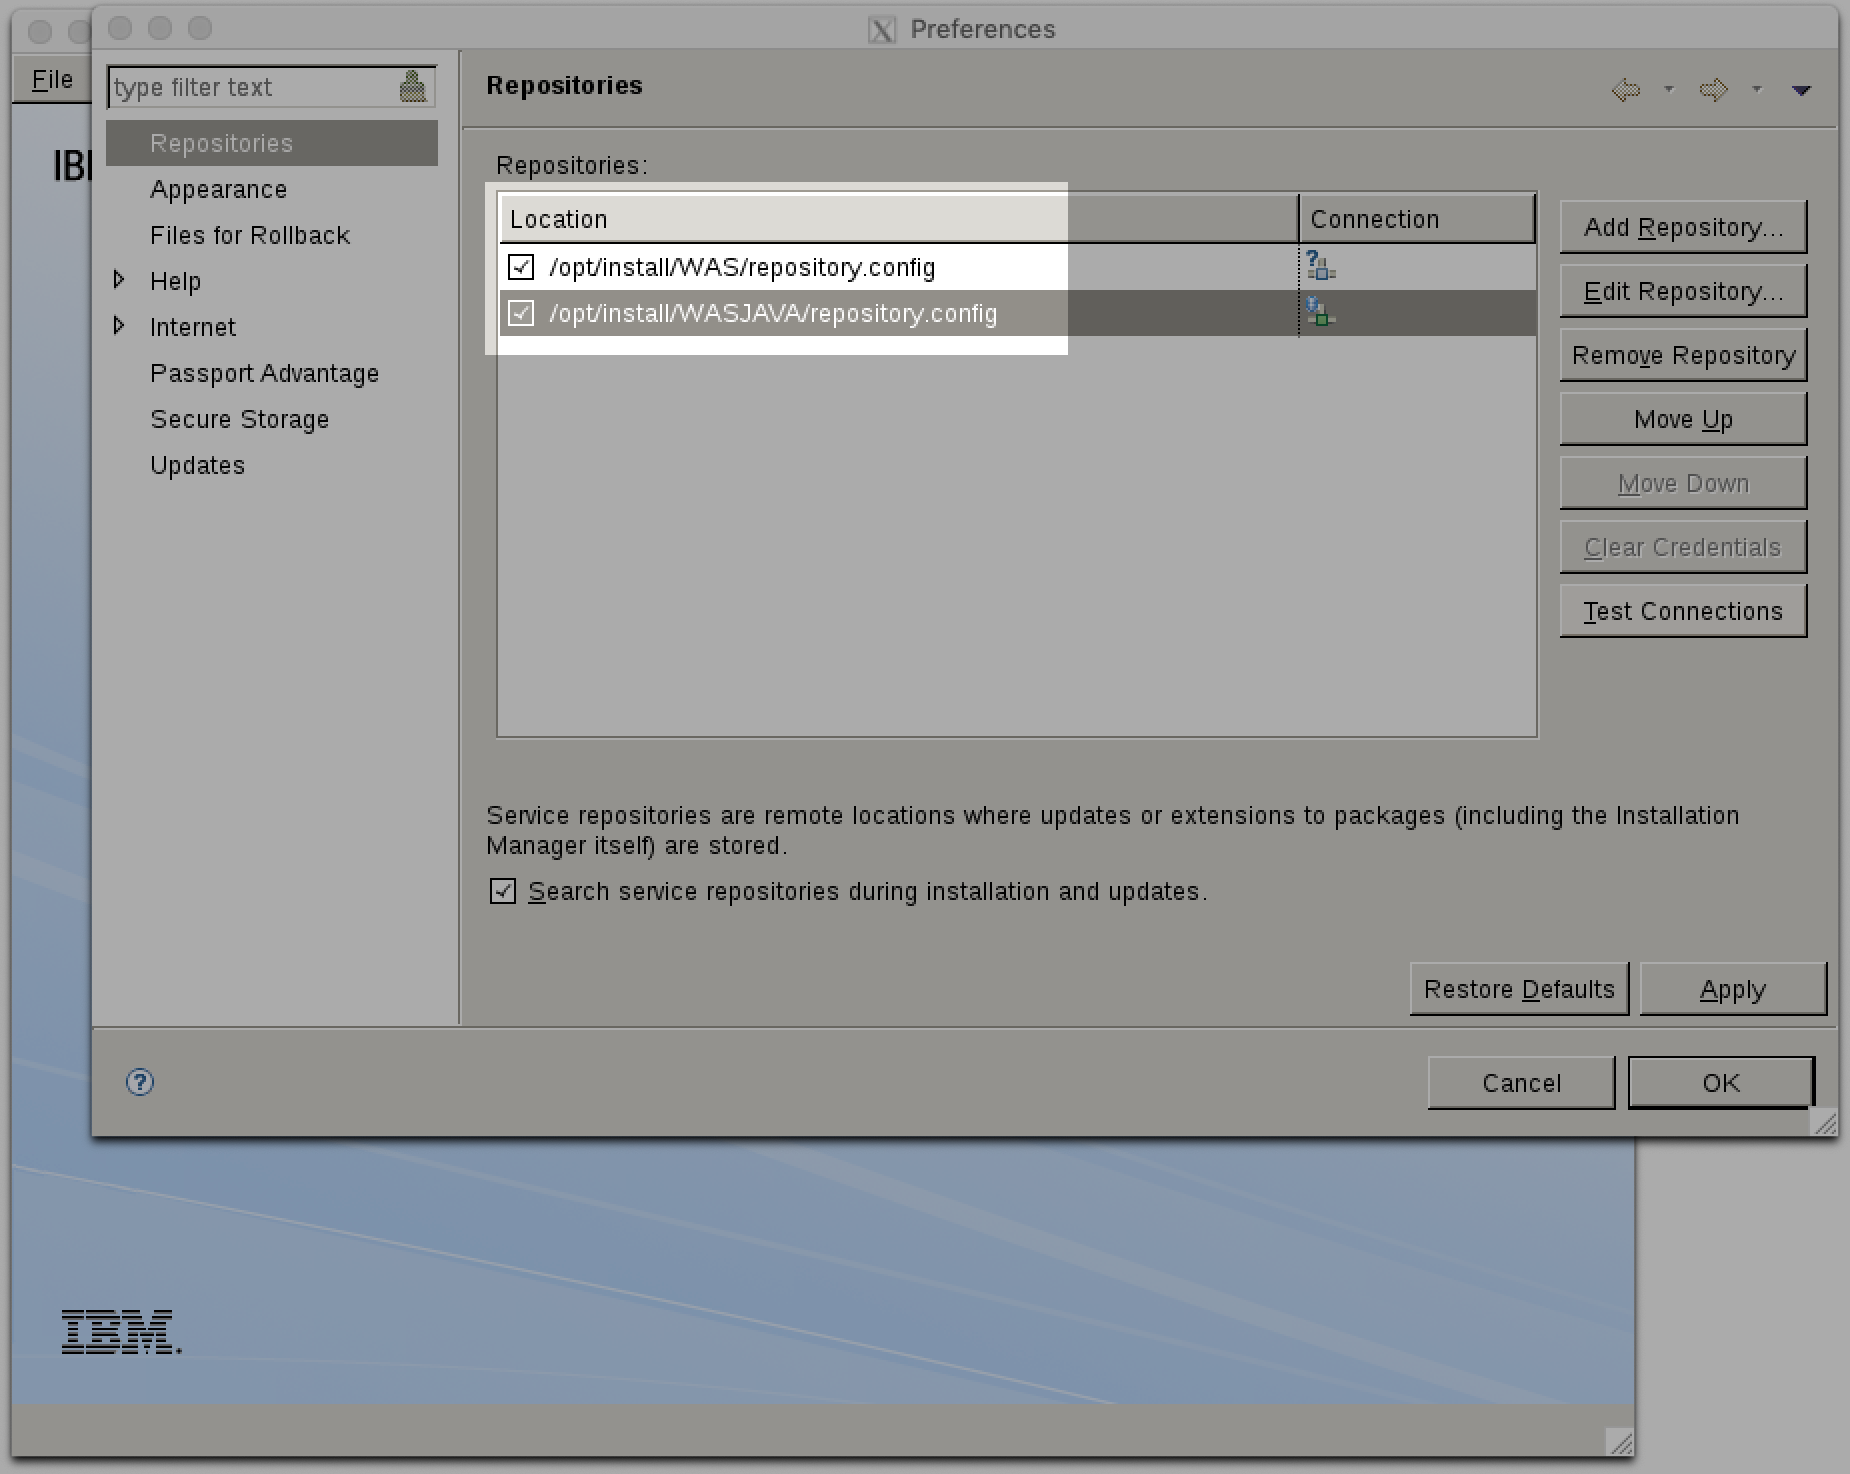
Go to Files – Preferences and add the WAS’ repository.config file and WAS JAVA’s repository file to the IM (like you did before when installed SDS).
On the main screen, click Install.
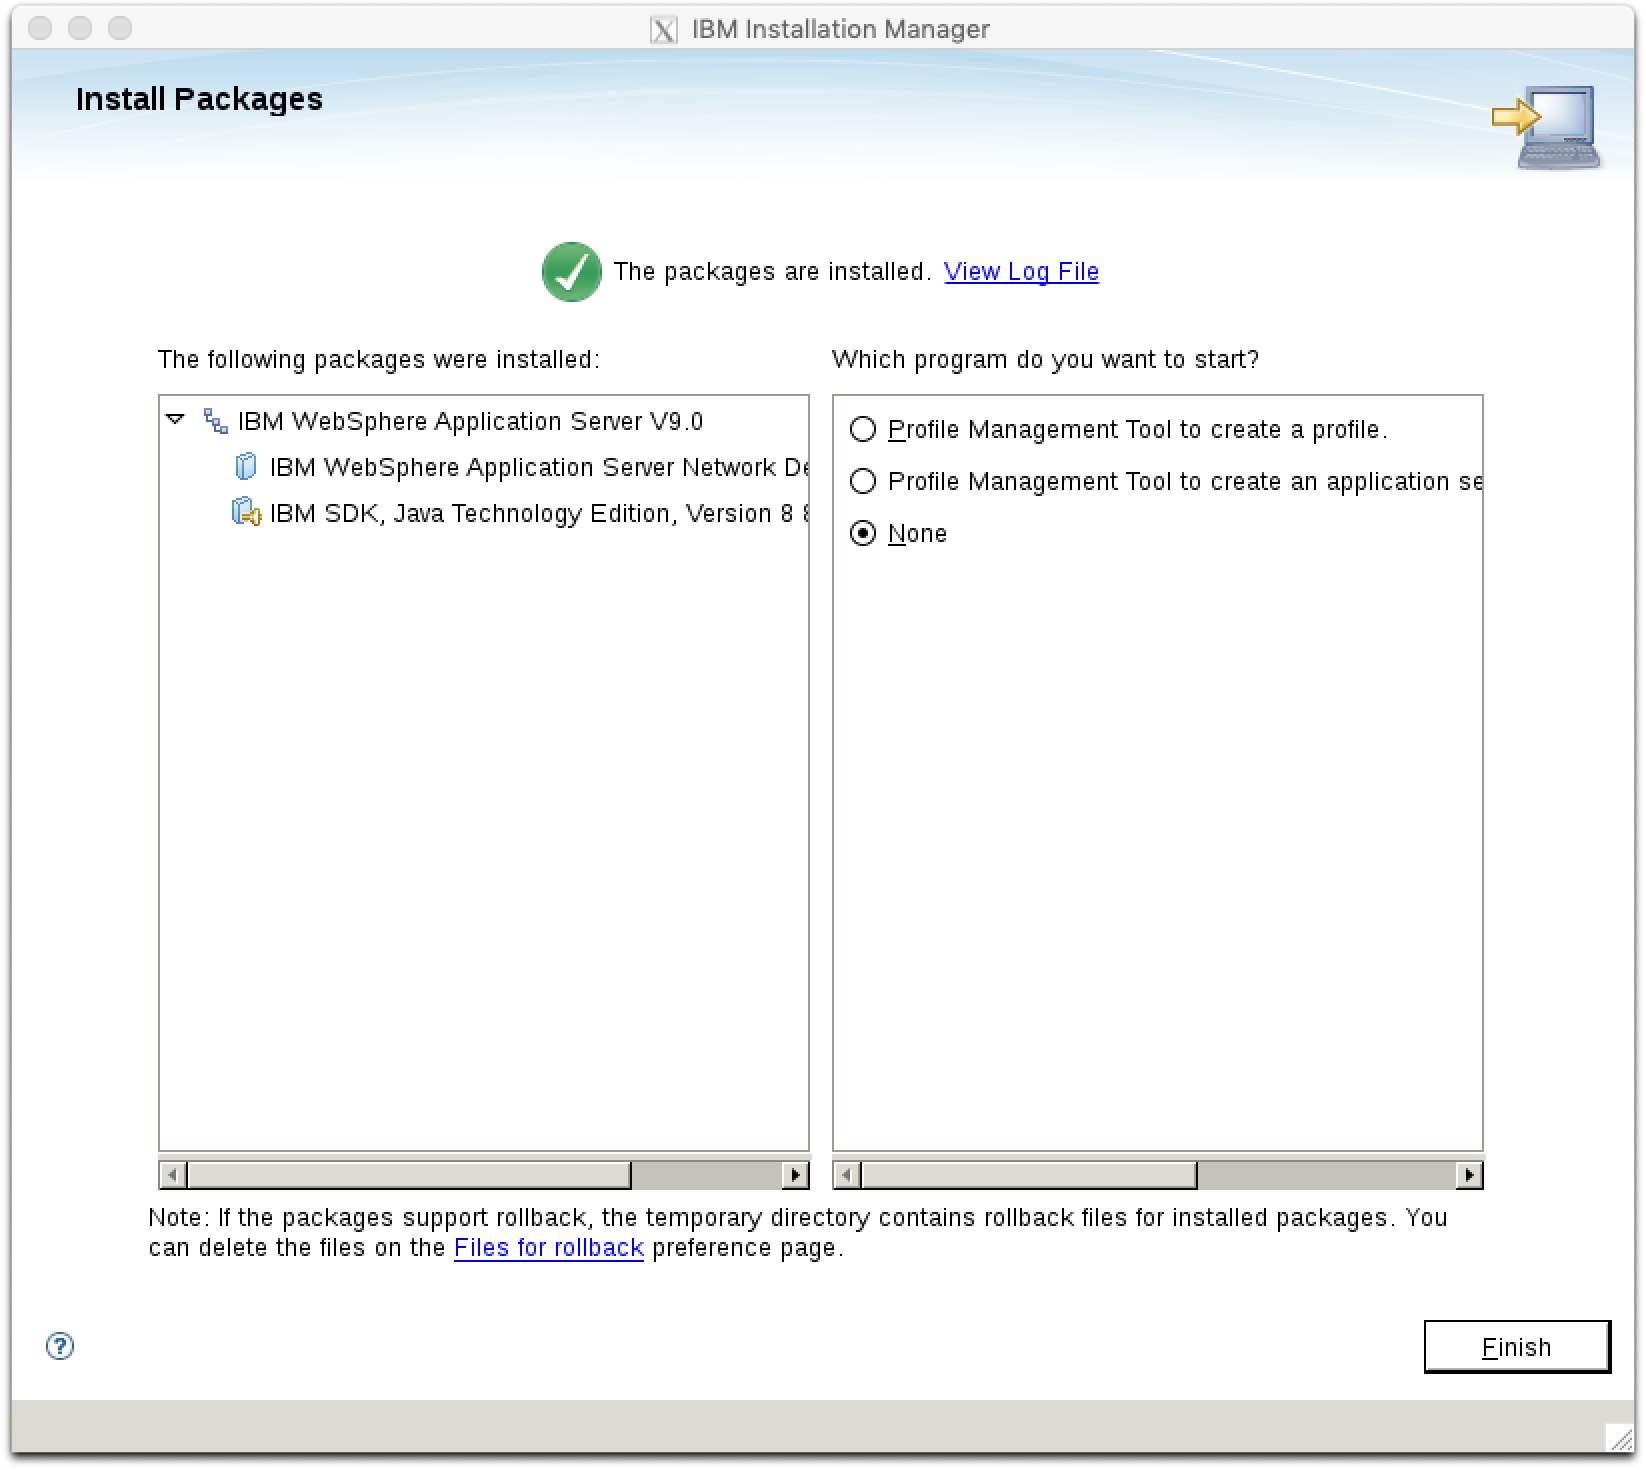
Hopefully IBM WebSphere Application Server V9.0 and IBM SDK, Java Technology Edition Version 8 will appear in the available installable component. Select all the options and then click button Next. Follow the installation wizard.
Leave everything on default and off the installation process. Once the installation finished, do not let IM to start any tools. Simply choose option None.
Go back to Files – Preferences in IM, and remove the configured repositories, but do not quit IM.
Head back to IM and click Update, then select IBM WebSphere Application Server and click Next. IBM IM will prompt you for your IBM ID credentials. Provide them and wait to get the results. Once the progress bar disappeared, IM will show you the available fixes for WAS. As of I’m writing this post, the latest version is 9.0.0.9. Select the available patch and proceed with the update wizard. Install the interim fixes as well. Once you started the update process, IM will download the selected fixes and apply them on WAS.
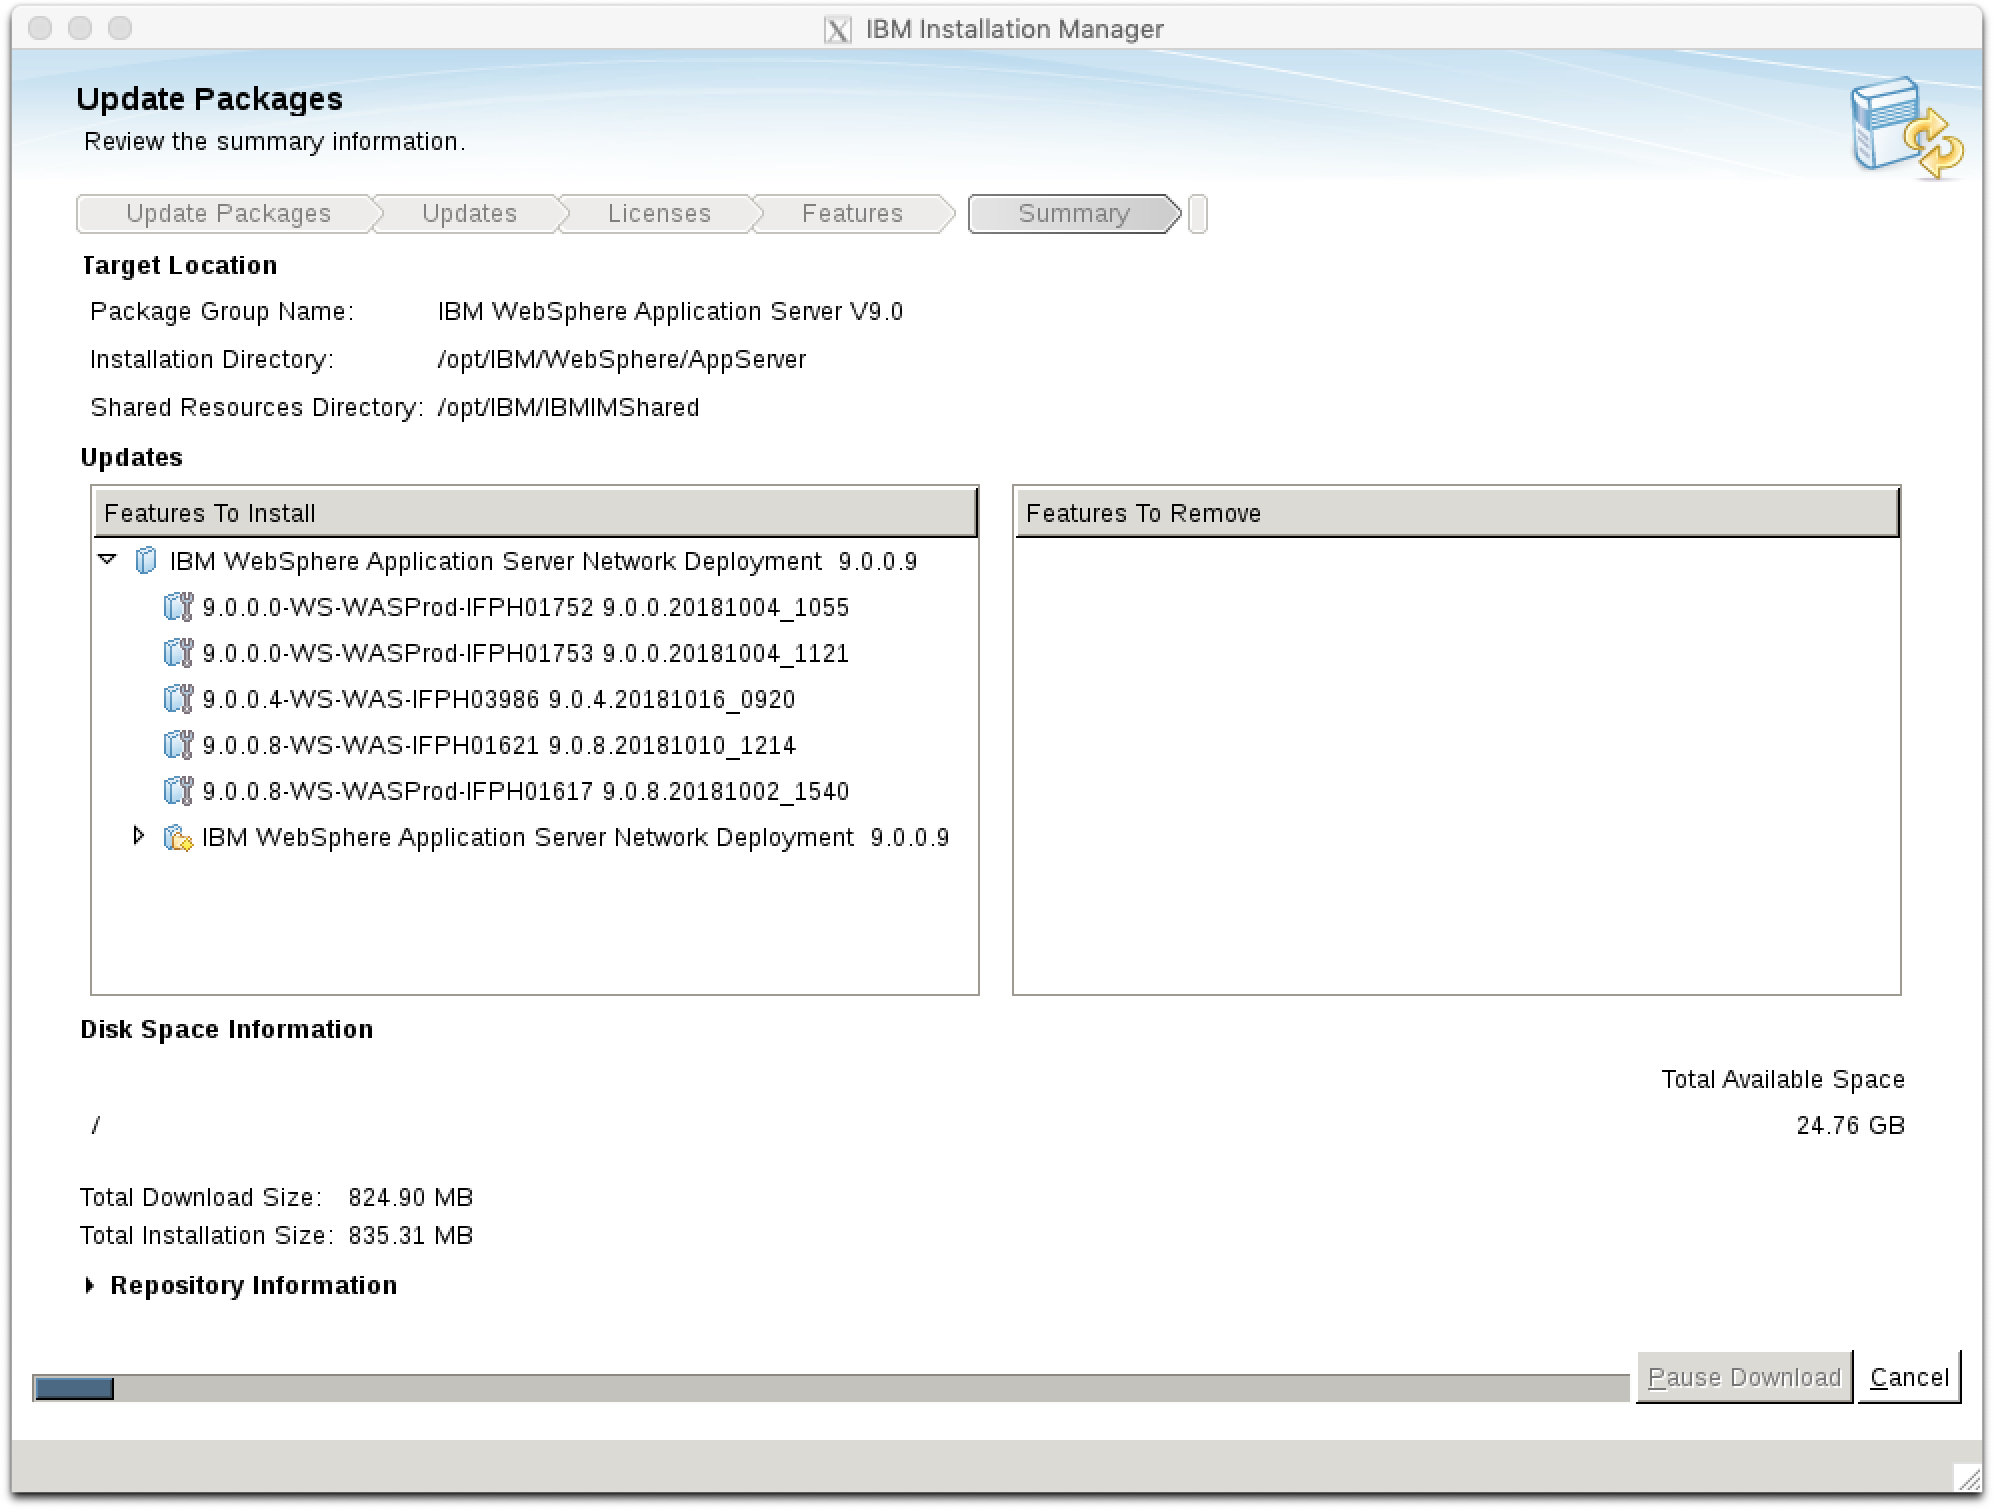
Once it is finished, you can safely quit IBM IM and do some clean-up.
rm -rf /opt/install/WAS
rm -rf /opt/install/WASJAVA
Create WAS server profile
WebSphere designed a similar way like SDS. Binaries and profiles are two different things and furthermore, multiple server can be created in a profile. Now, we installed and fixed the binaries, now it’s time to create a profile. You can create profiles using a graphical tool, but I prefer not clicking 200 times using that tool, I prefer to create a profile using a single command. To create a profile using a command line tool, do the following:
Go the /bin folder of the installed WebSphere binary directory:
cd /opt/IBM/WebSphere/AppServer/bin/
Issue the following command with your values if you want, or use my default ones:
./manageprofiles.sh -create -adminUserName admin -adminPassword admin -cellName SDSWebAppCell01 -defaultPorts -enableAdminSecurity true -isDefault -nodeName SDSWebAppNode01 -profileName SDSWebAppProfile1 -serverName server1
The arguments are the following:
- -create to create a new profile
- -adminUsername the primary administrator’s username
- -adminPassword password of the primary administrator
- -cellName name of the administration cell
- -defaultPorts use the default port numbers
- -enableAdminSecurity true or false rather you want to enable admin interface security or not (suggested is true)
- -isDefault this will be the default profile in this installation
- -nodeName multiple nodes can be added to a cell, therefore each node in a cell has a unique name. This is it.
- -profileName name of the profile (on the filesystem).
- -serverName multiple servers can be added to the same profile, therefore each server in a profile has a unique name. This is it.
Once the command finished, we’re ready to start our server by navigating to the profile’s bin directory and start the server:
cd /opt/IBM/WebSphere/AppServer/profiles/SDSWebAppProfile1/bin
./startServer.sh server1
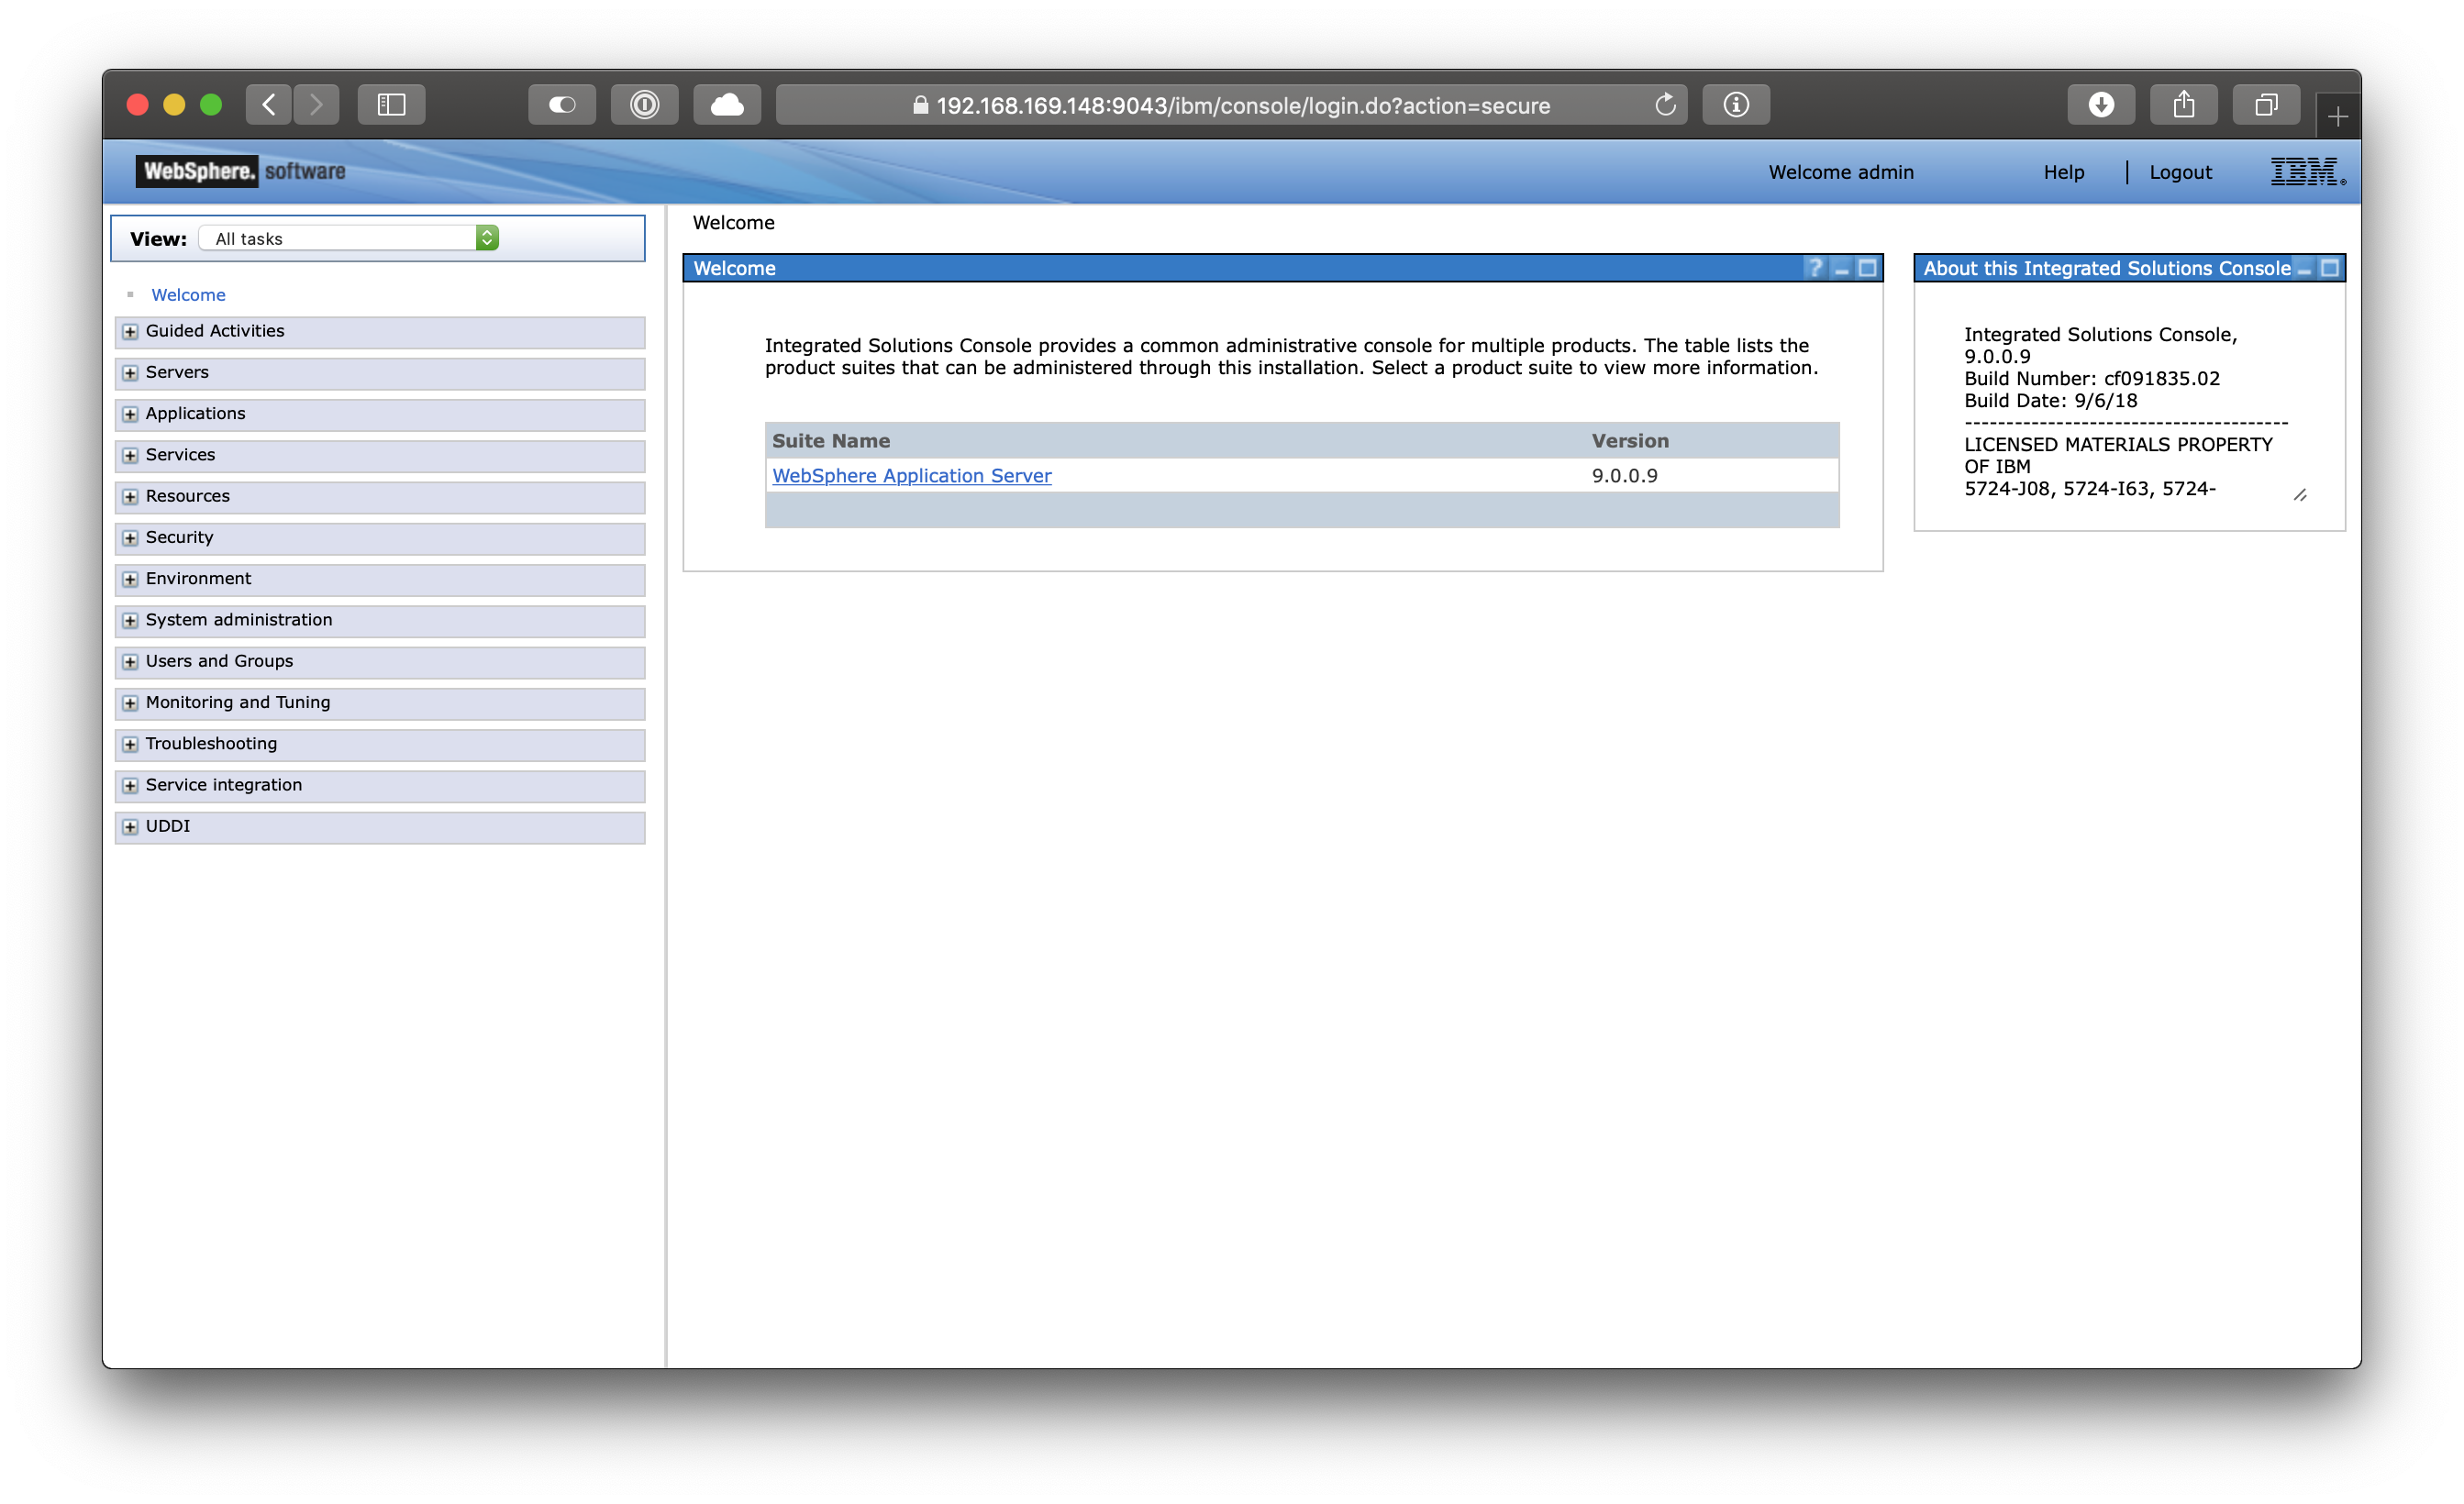
Once the server started, open a browser and head to the VM’s IP or hostname : 9060/admin URL. In my case this is:
http://192.168.169.148:9060/admin
Login with admin / admin.
Create a system service to start and stop WAS on server start and stop (optional)
If you want to start WAS profile we have just created by system on boot, you simply follow the instructions below.
Navigate to the /bin directory of the WAS binary:
cd /opt/IBM/WebSphere/AppServer/bin
And issue the following command to create a service:
./wasservice.sh -add IBMWAS_SDSWebApp -serverName server1 -profilePath /opt/IBM/WebSphere/AppServer/profiles/SDSWebAppProfile1
Where IBMWAS_SDSWebApp is the name of your system service.
Installing and configuring IDSWebApp on WAS 9.0
Installing IDSWebApp
Last and final step is to deploy the IDSWebApp tool onto our freshly created WAS. To do so, first you need to download the install package from the installed SDS binary, then login into the WAS admin console and deploy the application. Let’s get started.
Get the IDSWebApp.war file from /opt/ibm/ldap/V6.4/idstools/. Simply download the war file using SCP or something. Once you have the file, sign in to the WAS admin console. On the left navigation pane, expand the Applications – Application Types – WebSphere Enterprise Applications section. On the main area, you will see 3 installed applications. If you want you can remove it, but in our case does not matter. On the top of the table, there is an Install button, click on it.
On the next page, browse for the IDSWebApp.war file and go on. On the next screen, choose the Fast Path deployment and move on. On the next screen, click Step 3 to remove the asterisk from the title, then Step 4.
On Step 4, set the context root of the app:
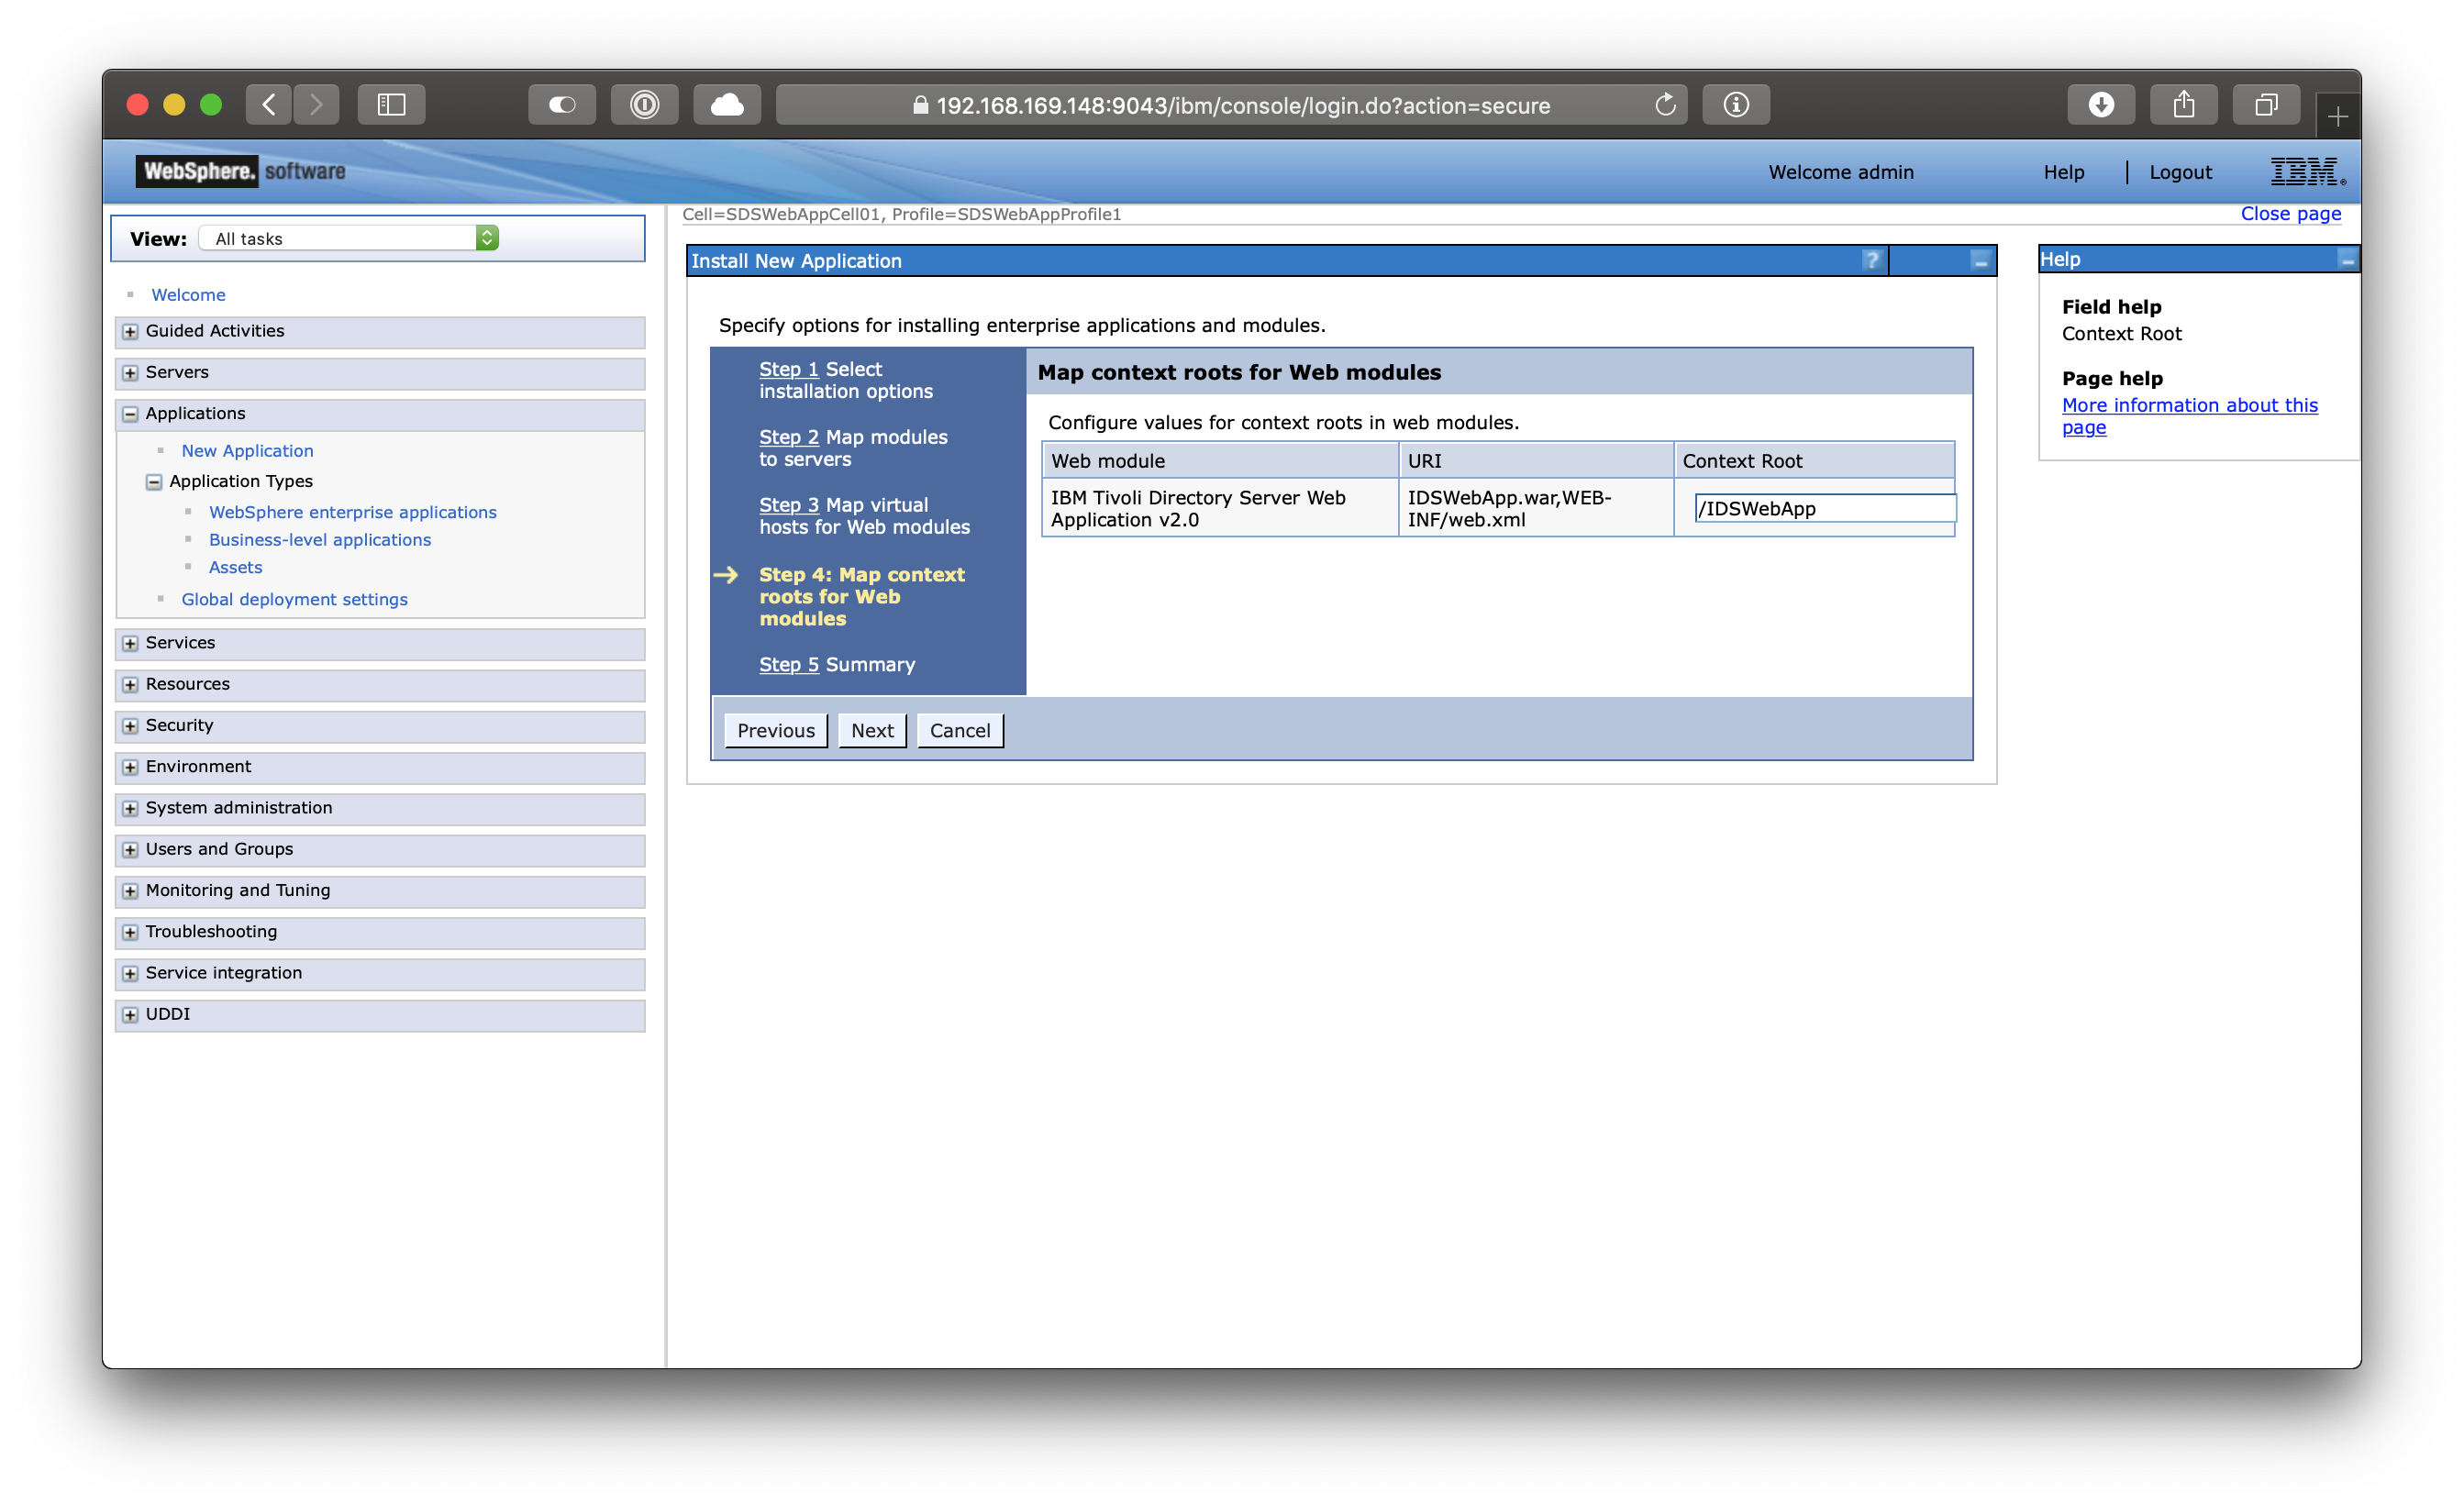
Click Next, and on Step 5, Click Finish. Wait until the app is deployed, and then click the Save link on the bottom of the page. Once you get back to the table, select the application and click button Start to start the application. Once the application started, the red cross will change to a green right pointing arrow.
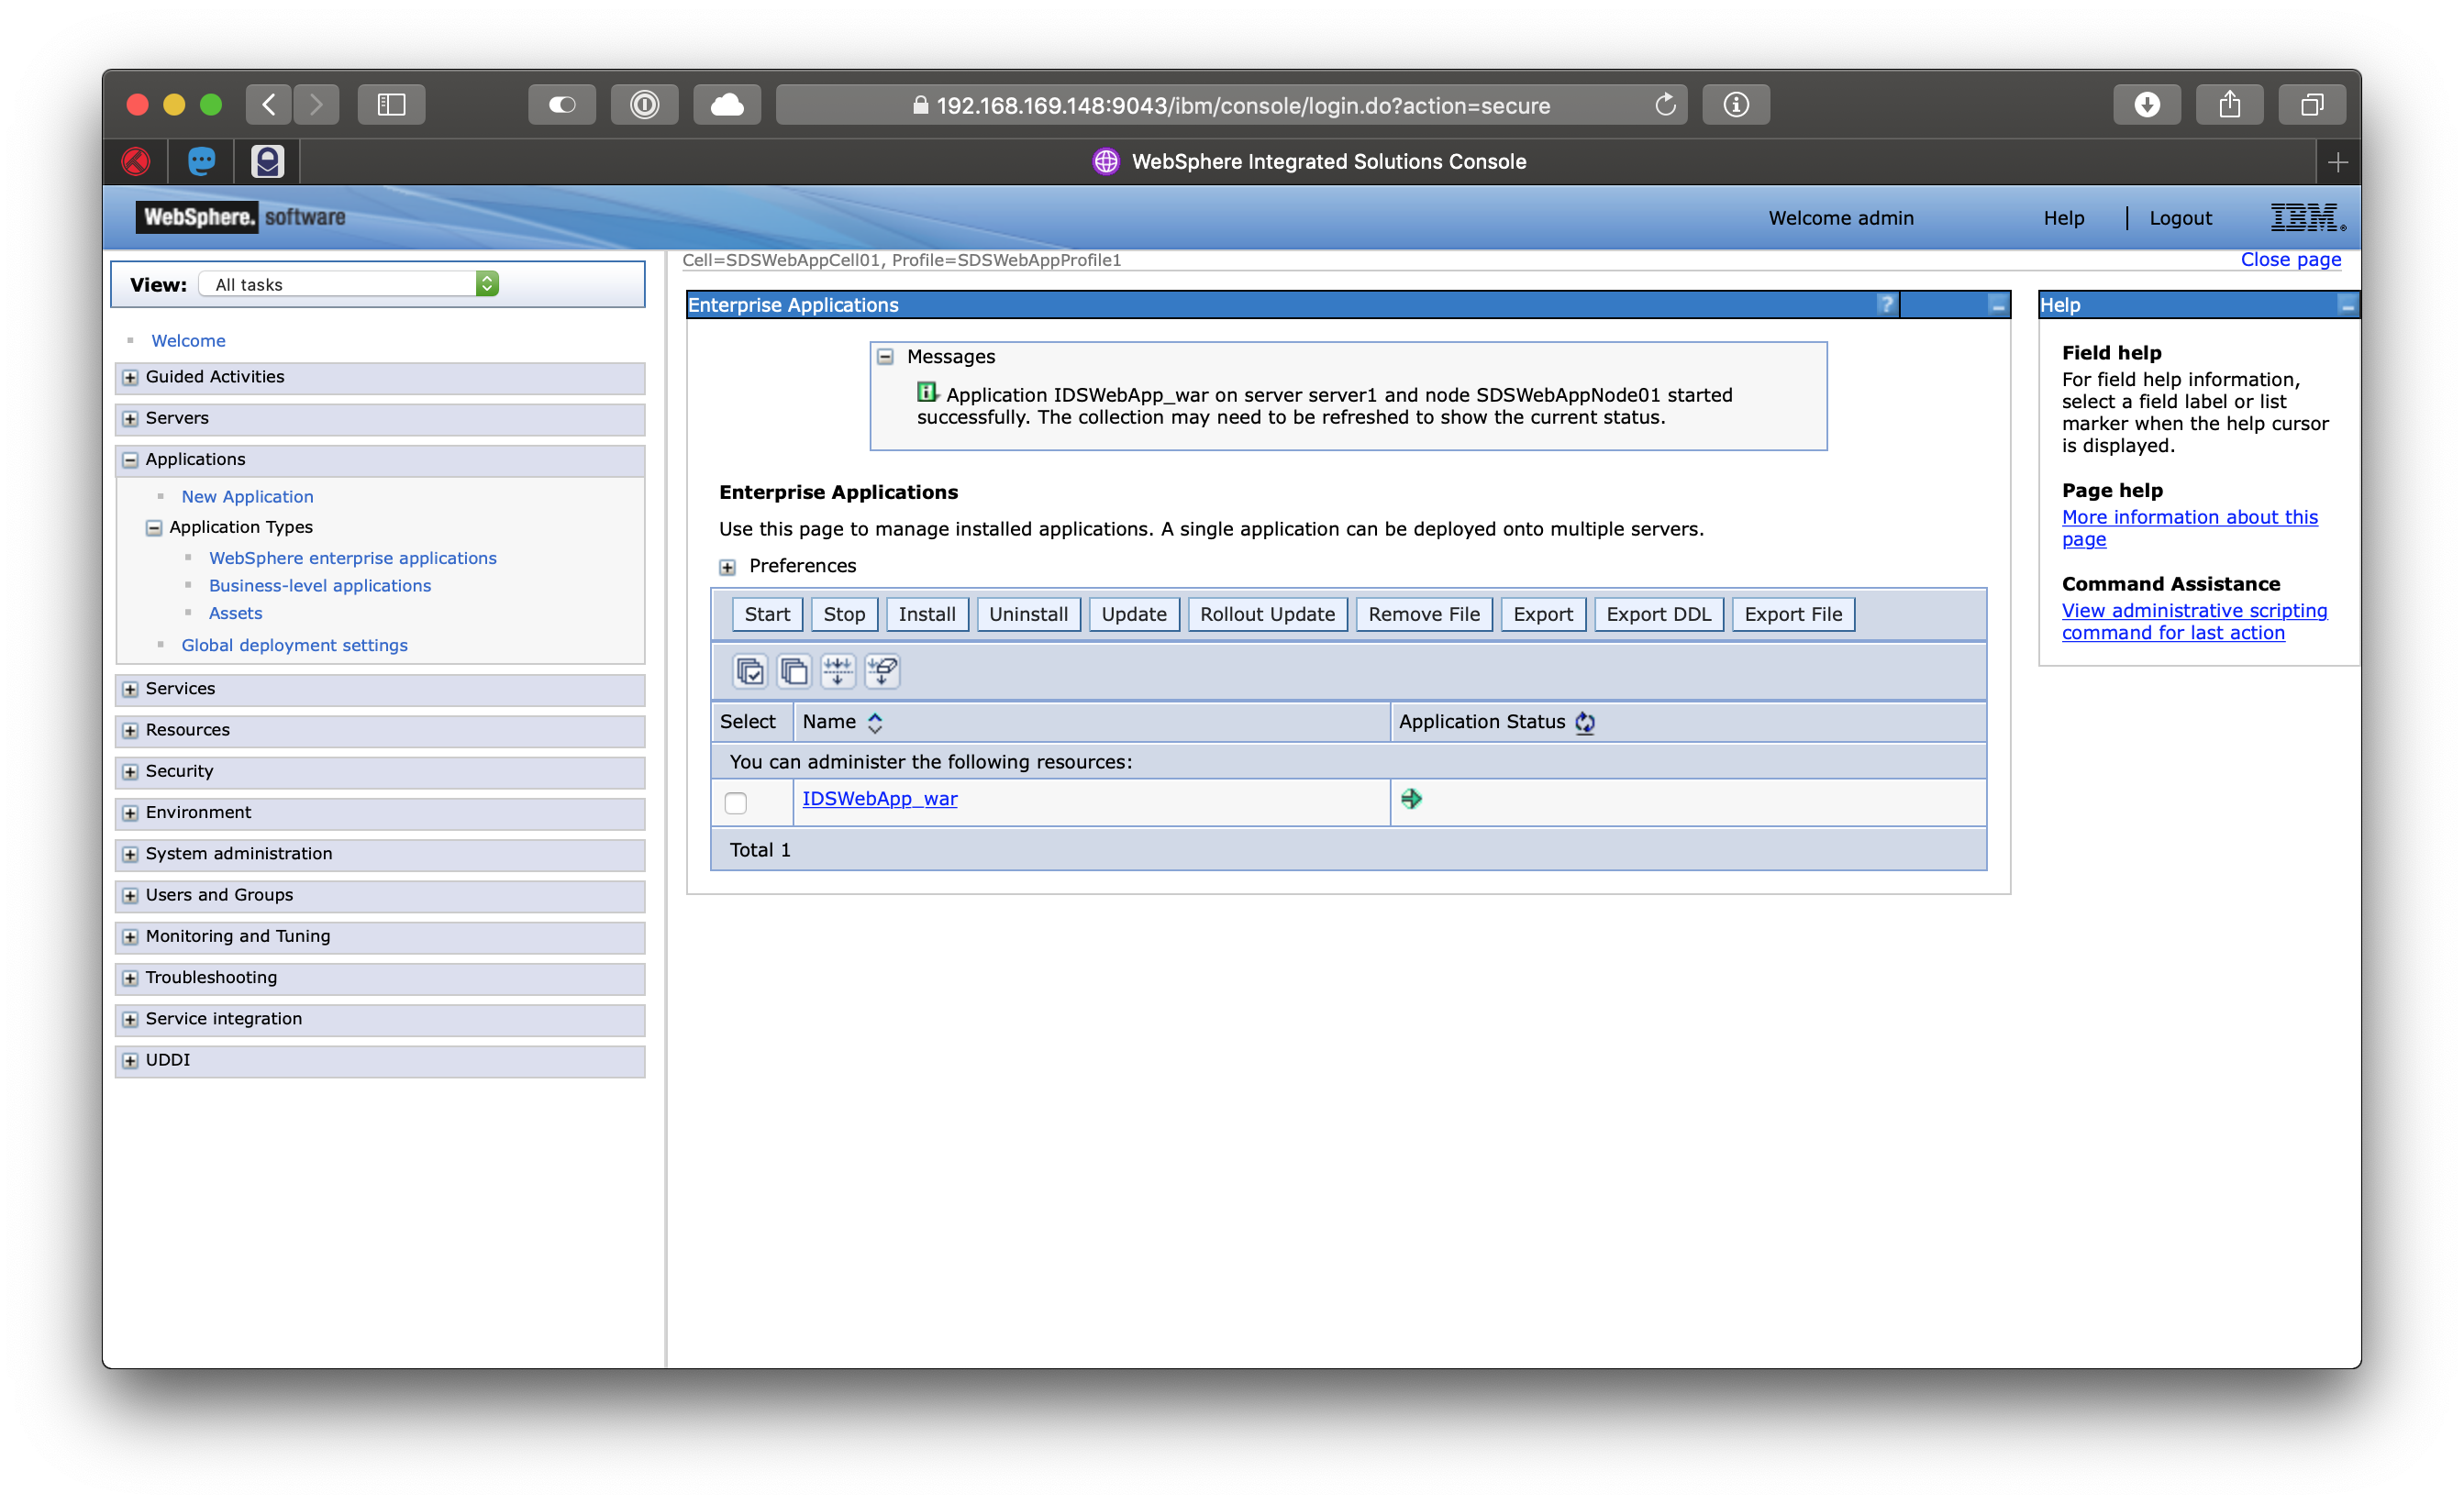
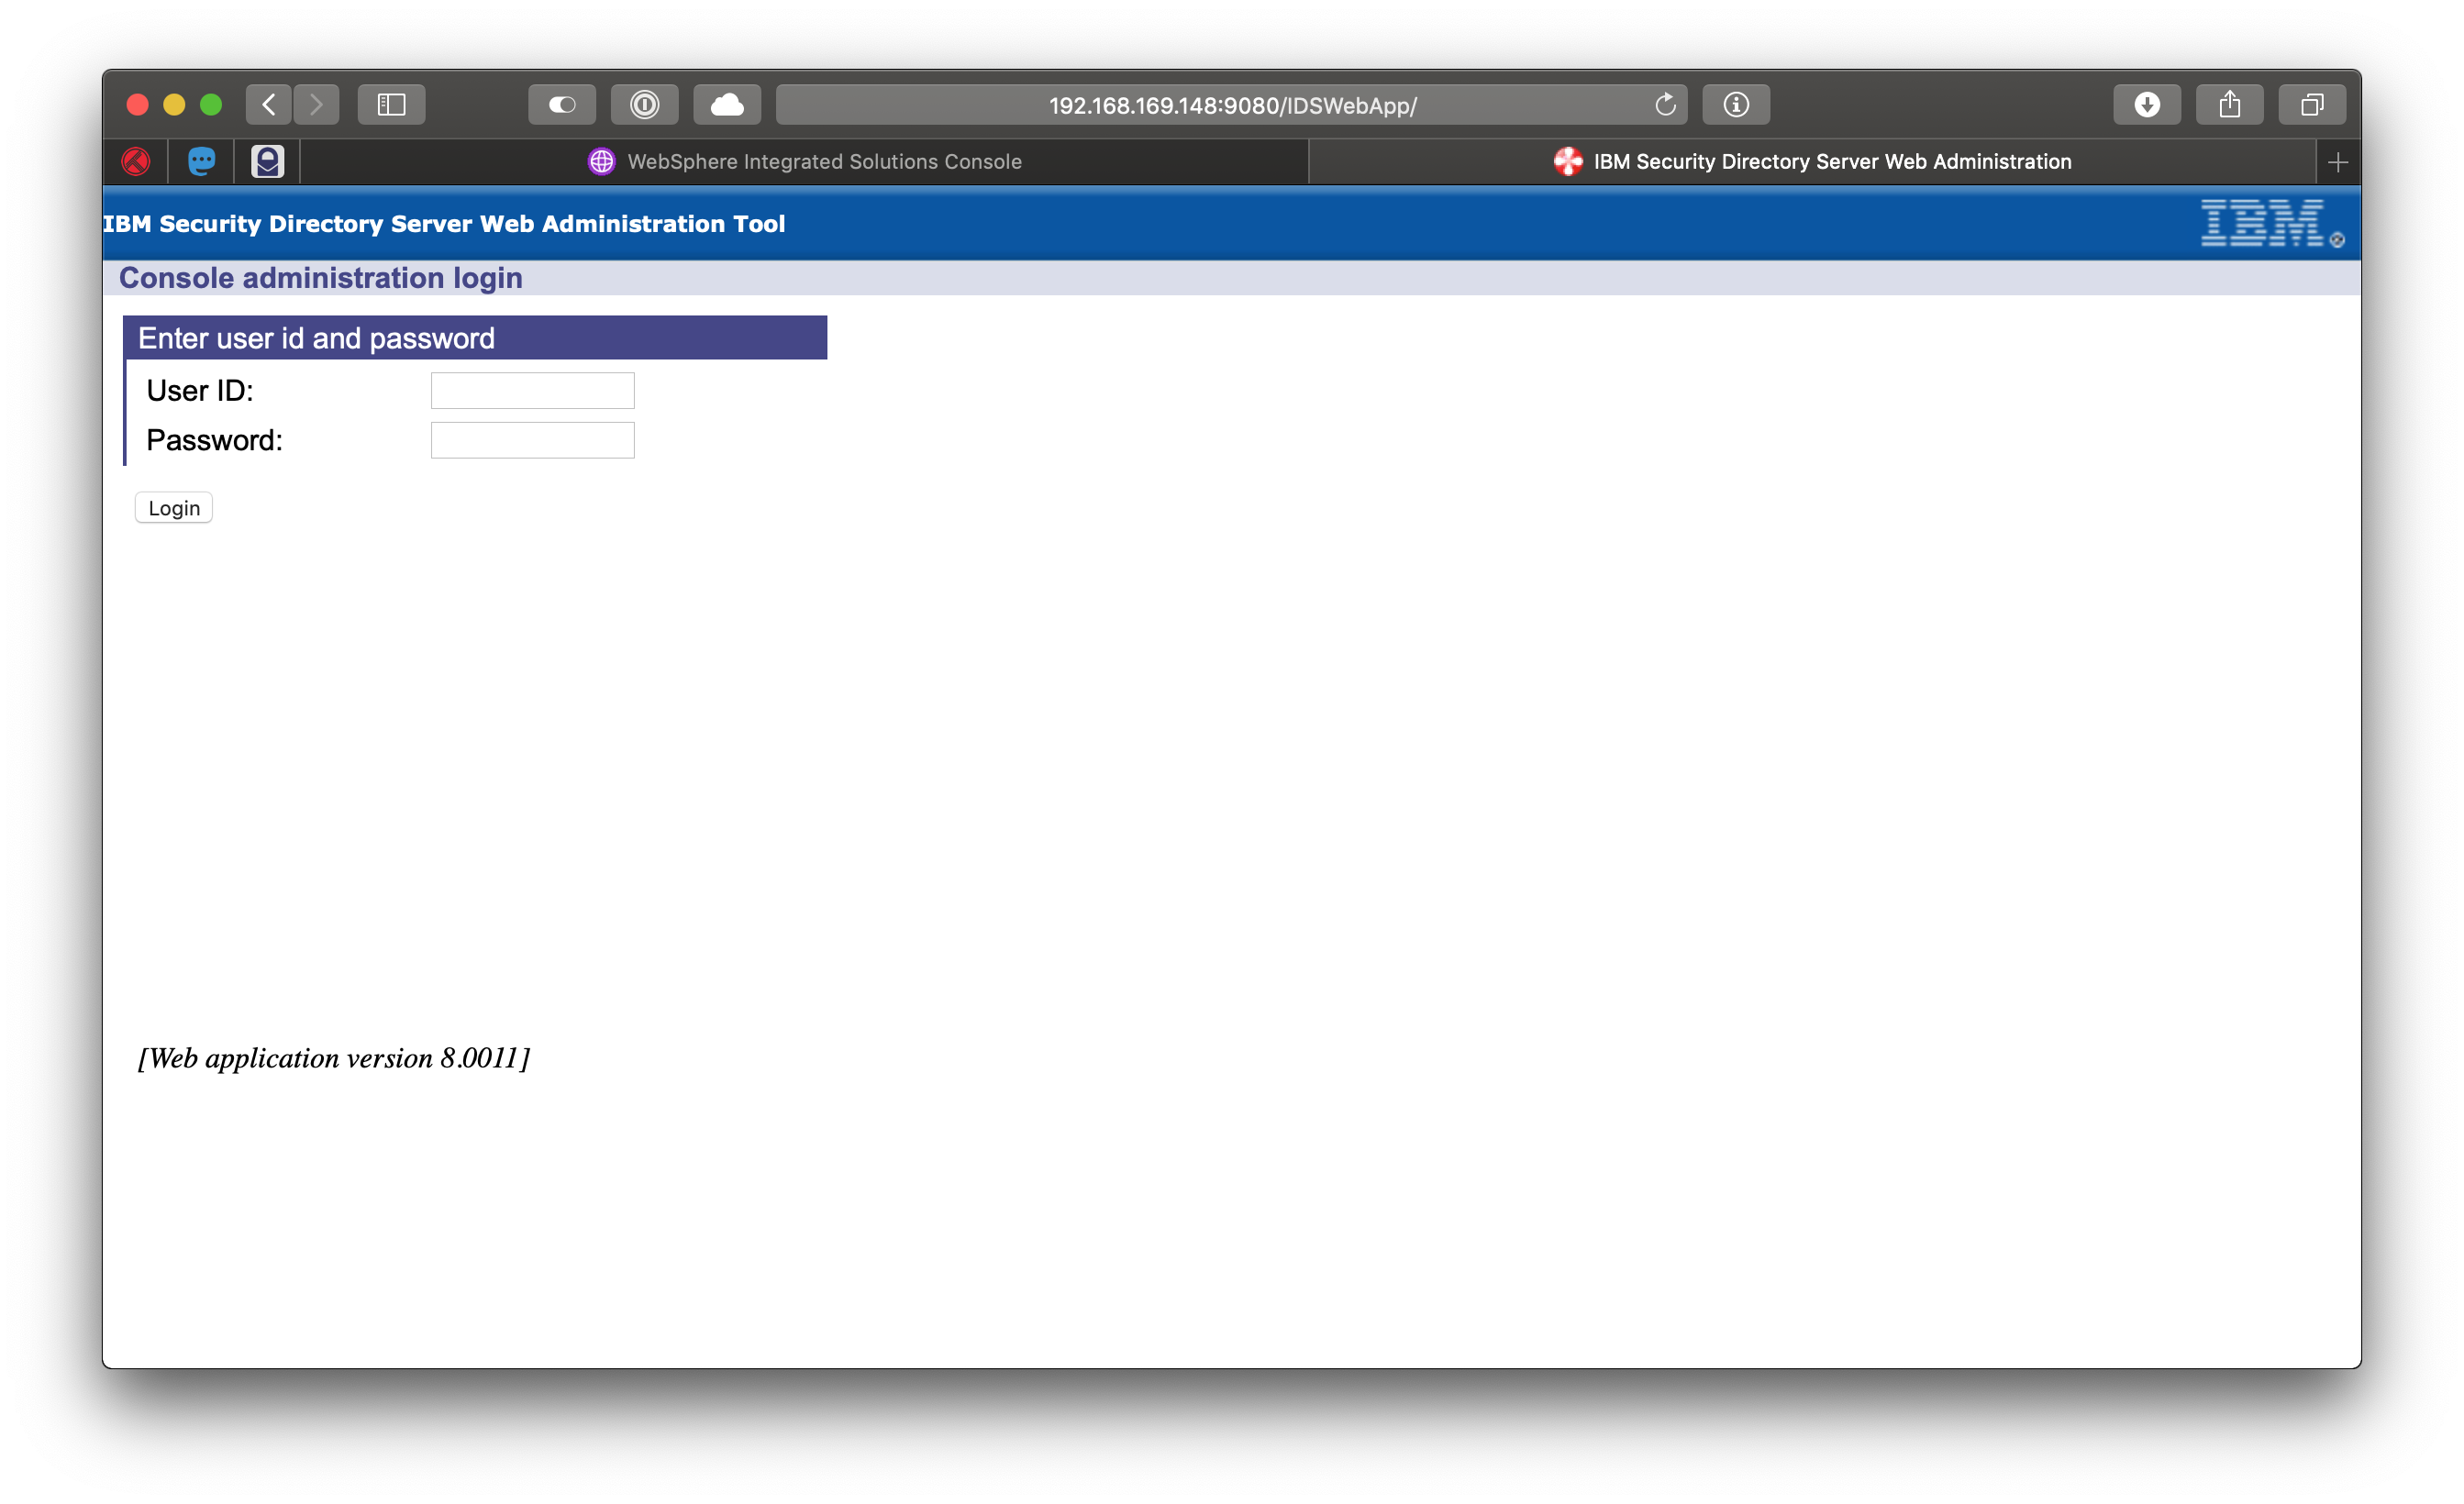
If you navigate to the VM’s IP or hostname :9080/context root you should be able to see the application’s configuration page.
http://192.168.169.148:9080/IDSWebApp
Configuring IDSWebApp
Okay, so we installed SDS, installed WAS, installed everything we had to. Now it’s time to configure IDSWebApp. IDSWebApp configuration is required because this application can manage multiple LDAP servers. So first, we need to configure an LDAP server profile, then we can sign in the configured LDAP server using the same tool.
To create a profile for a server, open the IDSWebApp application and sign in with the default user and password (superadmin / secret):
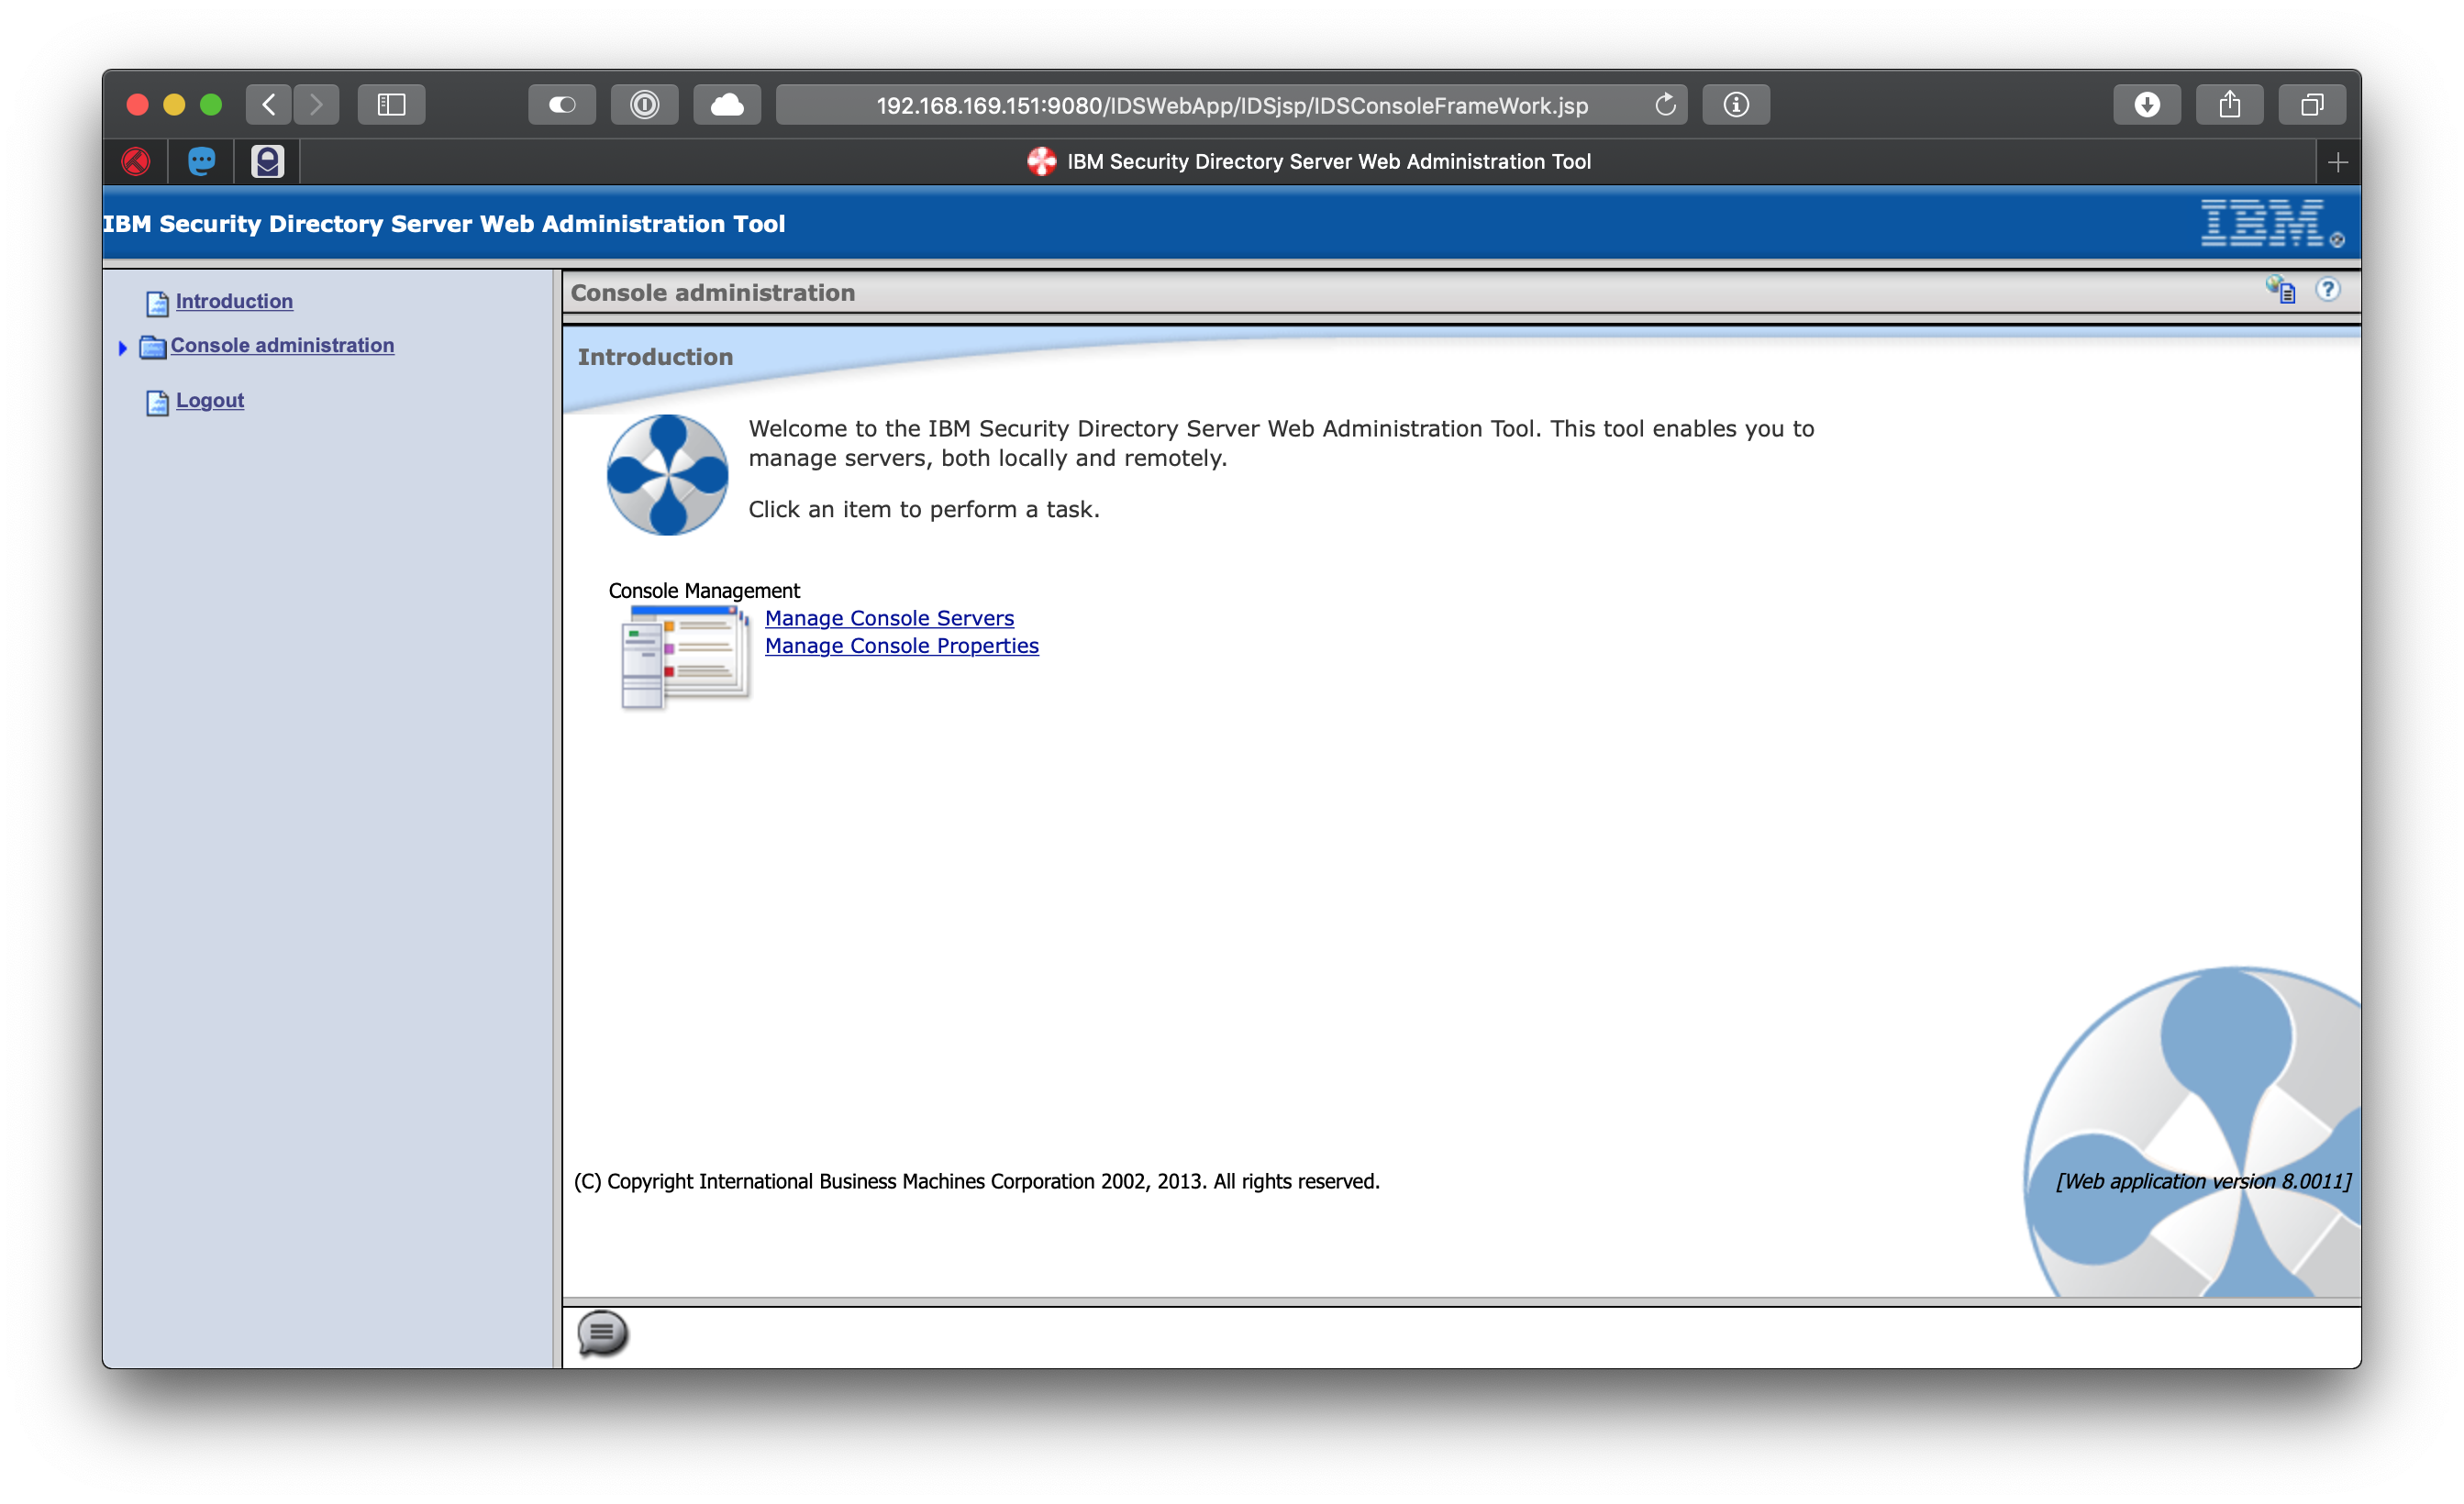
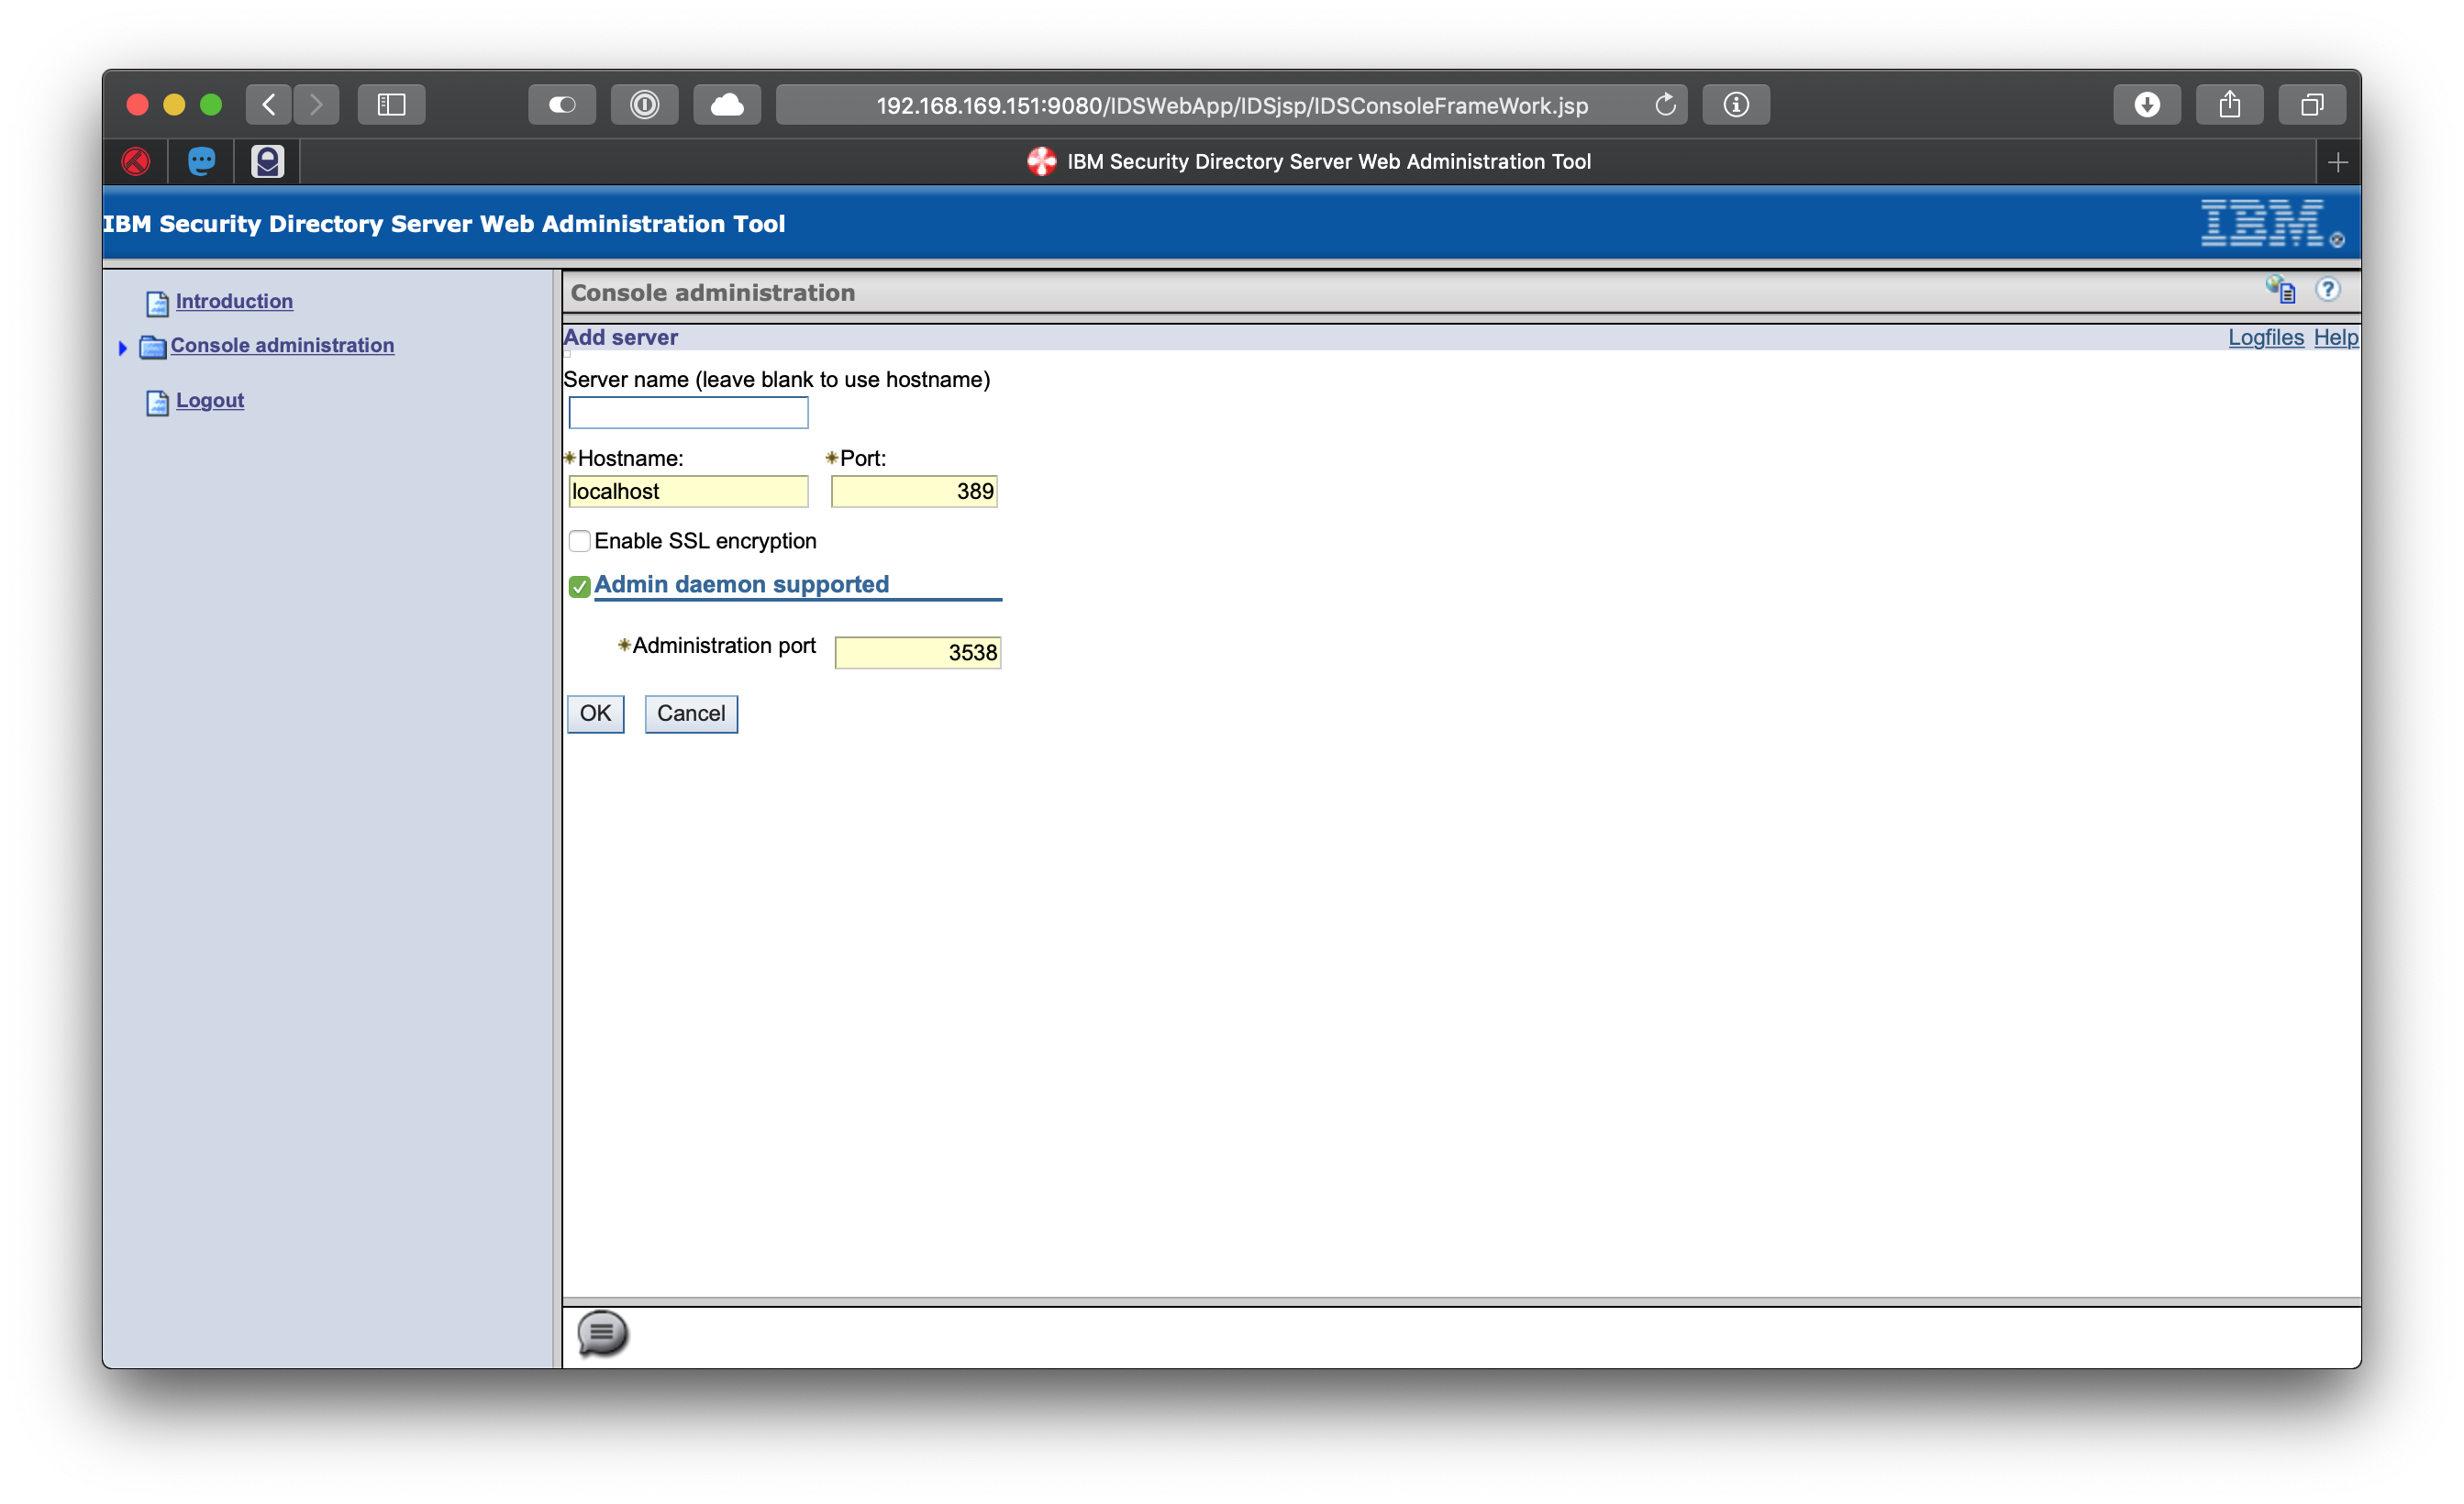
Once you are in, click on the Manage Console Servers link. Click on button Add and fill the form:
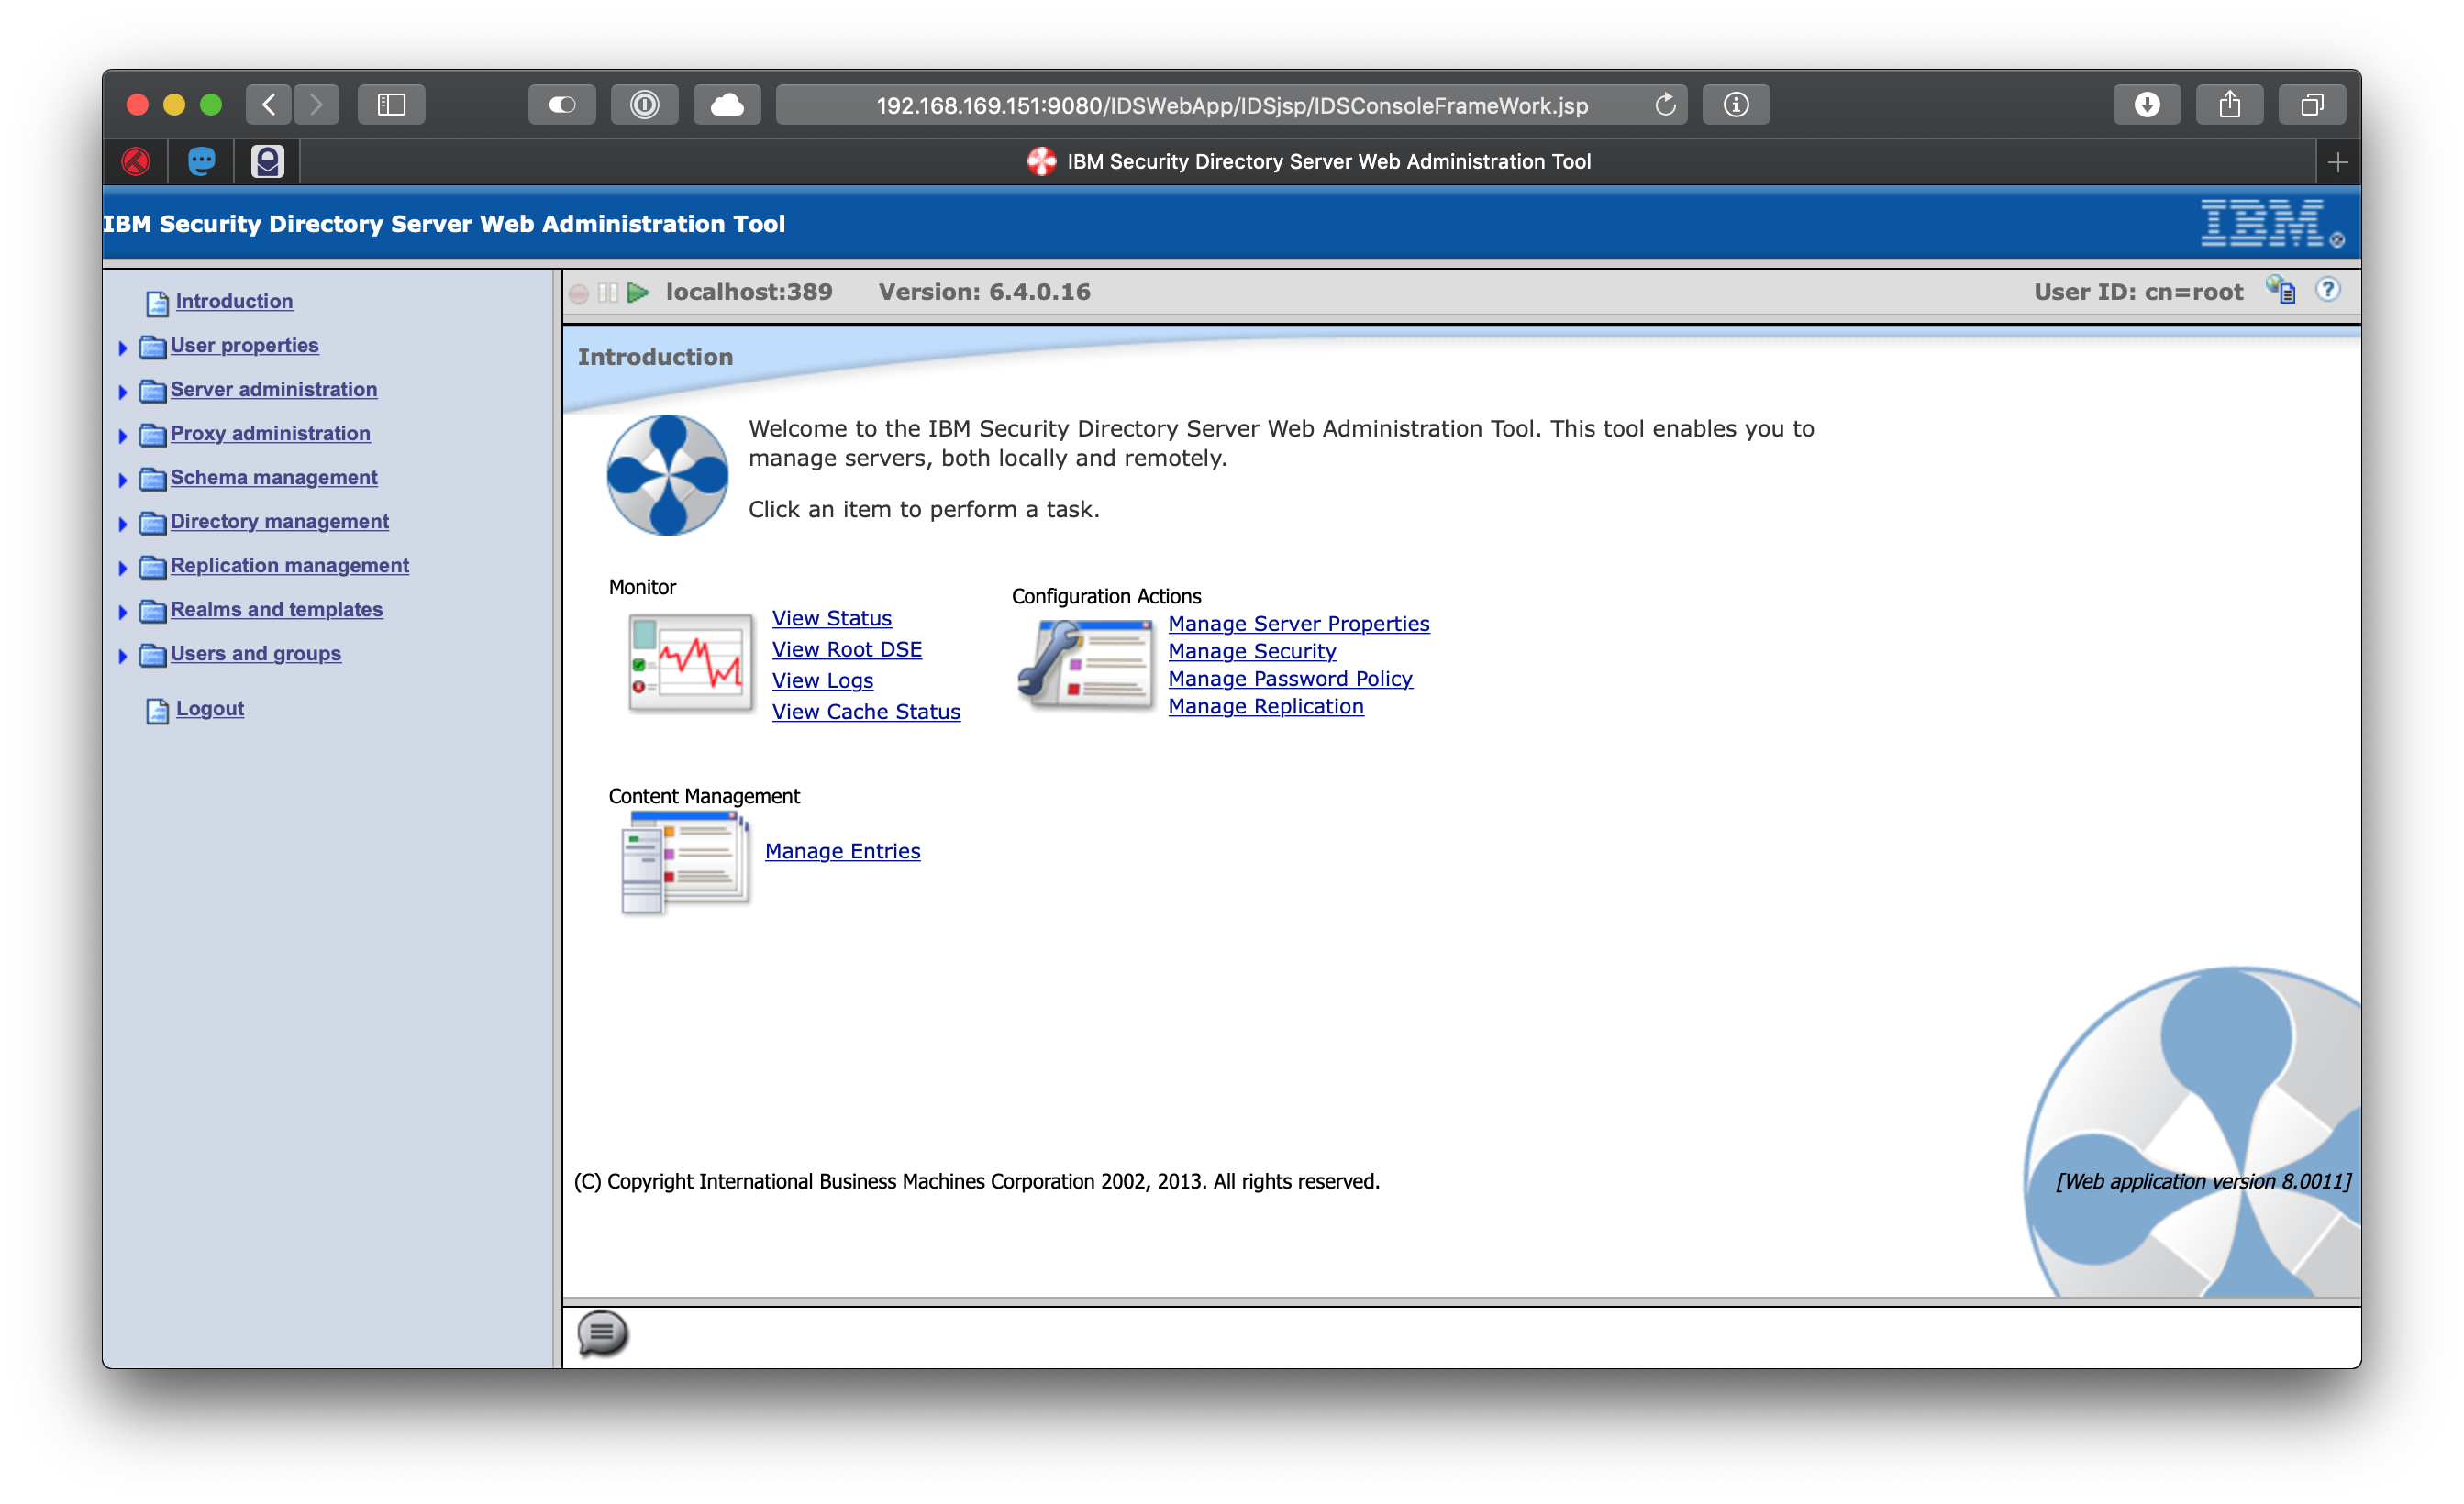
Ok, now you can logout and login into the LDAP server:

And you are in! Welcome!
You just created a complete IBM SDS installation with some extra components and got it configured! In the section below, I provide a little help how to start / stop or restart the actual server. Now you can start playing around! Happy LDAPing! 🙂
Start / Stop / Restart IDS LDAP server
Starting the instance
Starting SDS administration server
- Login to the server as root
- Go to the binary directory’s /sbin sub directory:
cd /opt/ibm/ldap/V6.4/sbin
- Start the administrative instance with the command below and wait for the process to complete:
./idsdiradm -I idsldap
Sample output of the command:
<timestamp> GLPCOM003I Non-SSL port initialized to 3538.
<timestamp> GLPCOM004I SSL port initialized to 3539.
Starting SDS directory server instance
- Login to the server as root
- Go to the binary directory’s /sbin sub directory:
cd /opt/ibm/ldap/V6.4/sbin
- Start the directory server instance with the command below and wait for the process to complete:
./idsslapd -I idsldap
Sample output of the command:
<timestamp> GLPCOM003I Non-SSL port initialized to 389.
<timestamp> GLPCOM004I SSL port initialized to 636.
Stopping the instance
To stop the SDS instance including its operating database, you should follow the steps below.
Stopping SDS directory server instance
- Login to the server as root
- Go to the binary directory’s /sbin sub directory:
cd /opt/ibm/ldap/V6.4/sbin
- Stop the directory server instance with the command below and wait for the process to complete:
./idsslapd -I idsldap -k
Sample output of the command:
<timestamp> GLPSRV086I Terminating server.
Stopping SDS administration server
- Login to the server as root
- Go to the binary directory’s /sbin sub directory:
cd /opt/ibm/ldap/V6.4/sbin
- Stop the administrative instance with the command below and wait for the process to complete:
./idsdiradm -I idsldap -k
Restart the instance
Follow the steps described previously in the natural way.
Last words
I really hope this – not so short – blog entry will help some of you getting started with IBM SDS. I know I didn’t cover all the specialities and twists you can face when trying to get this installed and configured. I will write another blog post a bit later, how to set the instance auto start and stop on OS boot / halt as well as how to configure TLS 1.2 for LDAP services.
P.S.: I wrote this blog post while I created my installation, so all the commands and inputs are fresh. If there is a typo or something, sorry. I have proof read it, but this is a day long post (in creation aspect).
Since I wrote this: